
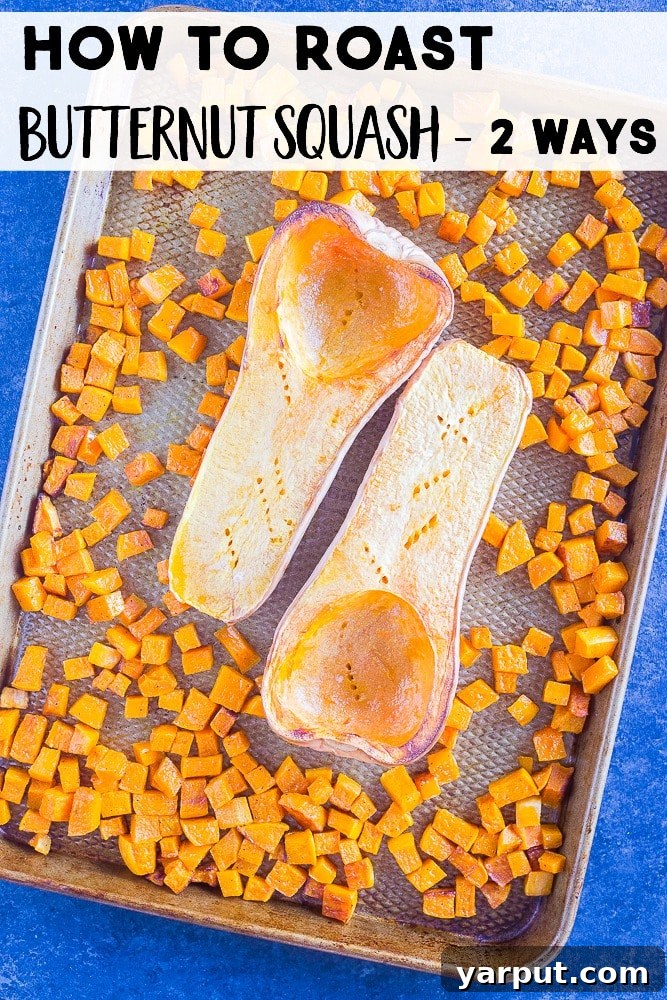
Discover the easiest ways to roast butternut squash to perfection—two distinct methods for every culinary need! Plus, get delicious ideas for how to use your roasted squash in versatile recipes.
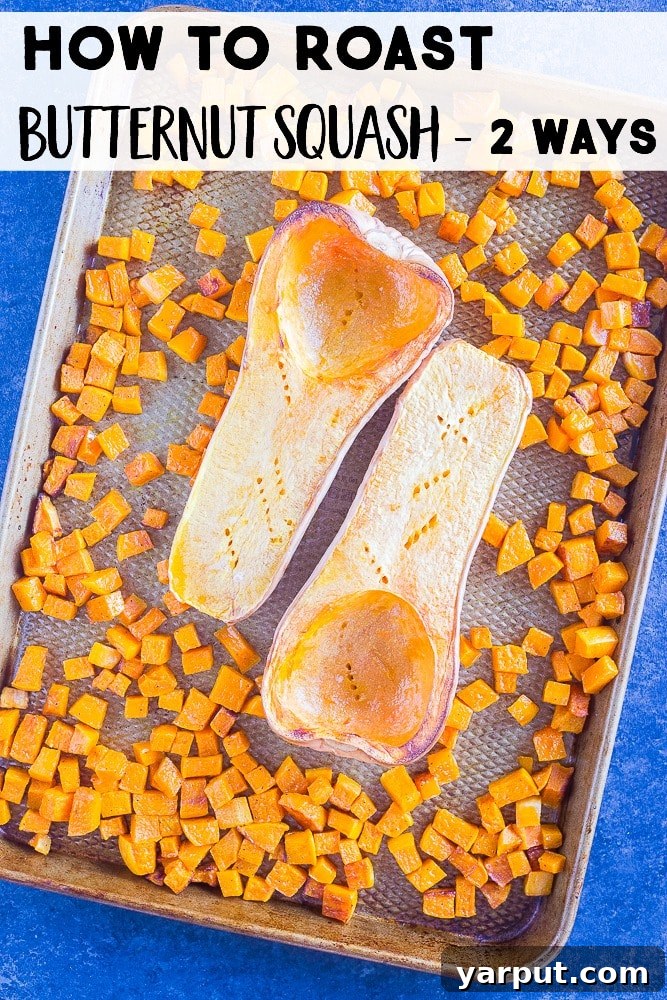
Mastering Roasted Butternut Squash: Two Easy, Foolproof Methods
As the leaves change and cooler weather arrives, winter squash takes center stage in our kitchens. Few vegetables offer the creamy texture, subtly sweet flavor, and vibrant color of butternut squash. It’s a true nutritional powerhouse, packed with vitamins, minerals, and fiber, making it a fantastic addition to any healthy diet. Whether you’re a seasoned chef or a kitchen novice, roasting butternut squash is a simple yet incredibly rewarding way to prepare this versatile gourd. The roasting process brings out its natural sweetness, creating a caramelized exterior and tender interior that’s simply irresistible.
Many people find the idea of preparing winter squash a bit intimidating—from its tough exterior to its sometimes awkward shape. But fear not! This comprehensive guide will walk you through two foolproof methods for roasting butternut squash, ensuring perfect results every time. We’ll cover everything from selecting the best squash to various cutting techniques and creative uses, empowering you to confidently incorporate this delightful vegetable into your meals.
Why Roast Butternut Squash? The Benefits of This Golden Gourd
Butternut squash isn’t just delicious; it’s also incredibly good for you. Roasting enhances its natural sweetness and makes it incredibly versatile for use in a wide range of dishes. Here’s why you should make roasted butternut squash a staple in your diet:
- Nutrient-Rich: It’s an excellent source of Vitamin A (in the form of beta-carotene, crucial for vision and immune function), Vitamin C (an antioxidant), and Vitamin E.
- High in Fiber: Butternut squash is rich in dietary fiber, which aids digestion, promotes gut health, and helps regulate blood sugar levels.
- Antioxidant Powerhouse: Beyond vitamins, it contains various antioxidants that help protect your cells from damage caused by free radicals.
- Versatile Ingredient: Roasted butternut squash can be used in countless ways—from a simple side dish to purees, soups, salads, and even baked goods.
- Naturally Sweet: The roasting process concentrates its natural sugars, creating a deliciously sweet and slightly nutty flavor without needing added sugars.
Choosing and Storing Your Butternut Squash
Before you begin roasting, it’s important to select a good quality butternut squash. Look for one that is firm, heavy for its size, and has a consistent, dull tan color. Avoid any squash with soft spots, blemishes, or green patches, as these indicate it may be underripe or starting to spoil. A healthy squash will have a hard, unblemished rind.
Once you’ve chosen your perfect squash, store it in a cool, dry place away from direct sunlight. Uncut butternut squash can last for up to one to two months, sometimes even longer, thanks to its sturdy skin. Once cut, store any unused portions in an airtight container in the refrigerator for up to 3-4 days. Roasted squash can also be stored in the fridge for 3-5 days or frozen for several months, making it excellent for meal prep.
Method 1: Roasting Butternut Squash Halves – The Easy Way
This method is perfect if you want minimal prep work and plan to use the squash for a creamy puree, a hearty stuffed dish, or simply as a rustic, elegant side. While it takes a bit longer to cook, the hands-on time is significantly reduced, and you completely bypass the challenge of peeling the squash!
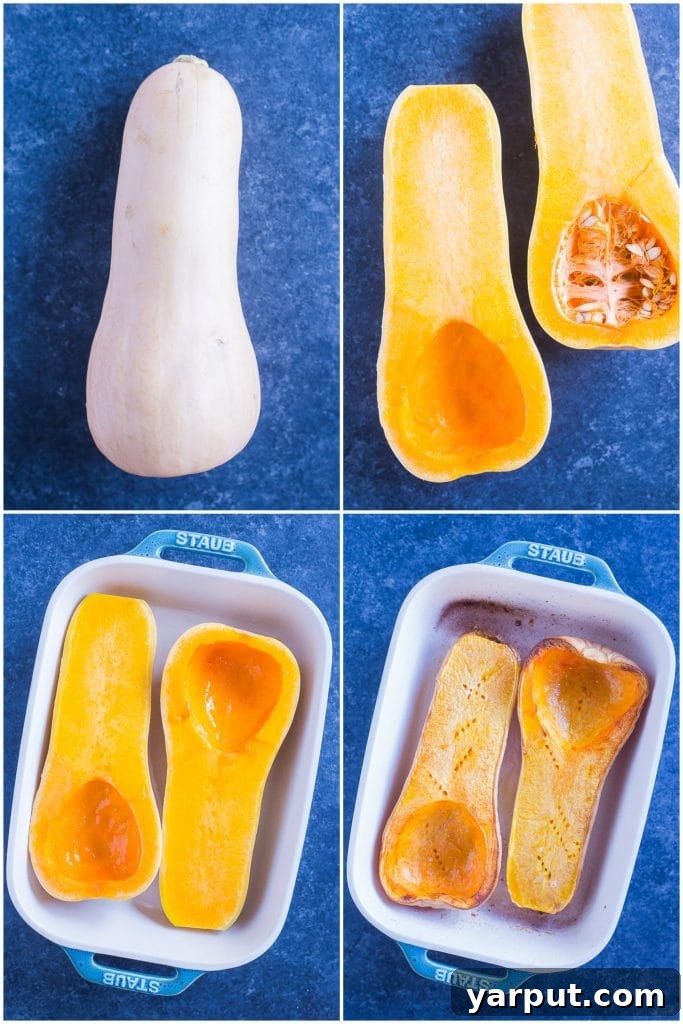
How To Roast Butternut Squash Halves
- Preheat Your Oven and Prepare the Squash: Begin by preheating your oven to 400°F (200°C). Wash the butternut squash thoroughly under running water and pat it dry. This step helps remove any dirt and ensures a clean surface for cutting.
- Carefully Cut the Squash in Half: Place the squash on a stable cutting board. Using a sharp, heavy-duty chef’s knife, carefully cut off the small, top brown stalk. Then, steadily slice the butternut squash in half lengthwise. It’s often easiest to start by piercing the skin near the stem and pushing the knife through, rocking it back and forth as needed. You want both halves to be as evenly sized as possible to ensure uniform cooking.
- Scoop Out the Seeds: Once halved, use a sturdy metal spoon or an ice cream scoop to remove all the seeds and stringy pulp from the center of each squash half. This process should be quick and easy.
- Season and Drizzle: Lightly drizzle the cut side of each butternut squash half with a small amount of olive oil. Season generously with salt and freshly ground black pepper. If you’re planning to make a sweet puree, you might omit the salt and pepper or opt for a sprinkle of cinnamon or nutmeg instead. For a savory stuffed squash, consider adding a pinch of garlic powder or dried herbs like rosemary or thyme.
- Prepare for Roasting: Place the seasoned butternut squash halves, cut-side down, on a large baking sheet or in a shallow baking pan. Pour about 1/4 cup of water into the bottom of the pan. This steam will help prevent the squash from drying out or burning and ensures a tender interior.
- Roast Until Tender: Roast the butternut squash in the preheated oven for approximately 60-75 minutes. The exact cooking time will vary depending on the size of your squash. The squash is ready when it is fork-tender, meaning a fork can easily pierce through the flesh, and the edges are slightly caramelized.
- Cool and Serve: Carefully remove the baking sheet from the oven. Allow the squash to cool for a few minutes before handling. The tender flesh can then be scooped out and used as desired.
Tips for Perfect Whole Roasted Butternut Squash:
- Even Halves: Strive for similarly sized halves to ensure they cook at the same rate.
- Moisture is Key: Don’t skip the water in the pan; it’s crucial for achieving that perfectly moist and tender result.
- Customize Seasoning: Adapt your seasonings based on your intended use. For sweet applications, try a touch of maple syrup or brown sugar before roasting.
- Don’t Overcrowd: Give your squash halves enough space on the baking sheet for even cooking and browning.
Method 2: Roasting Butternut Squash Cubes – The Versatile Choice
This is arguably the most popular and versatile method, yielding bite-sized pieces with wonderfully caramelized edges and a tender interior. Roasted butternut squash cubes are fantastic as a side dish, tossed into salads, mixed into grain bowls, or even added to soups and curries. The increased surface area allows for maximum flavor absorption from your seasonings, creating a truly delicious experience.
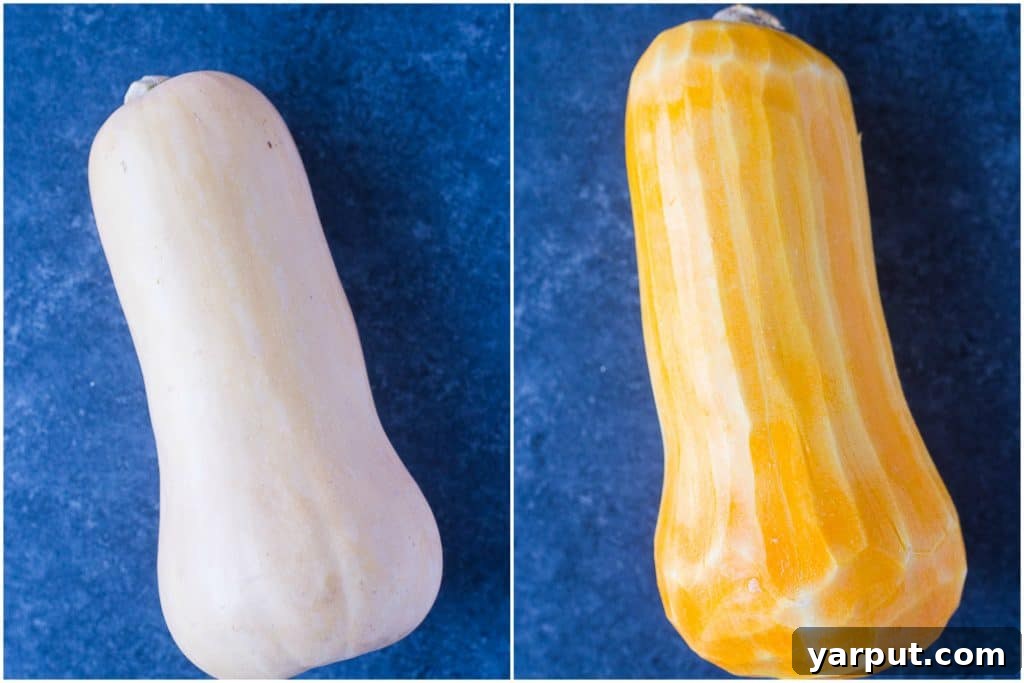
How To Make Roasted Butternut Squash Cubes
- Preheat Oven and Prepare for Peeling: Preheat your oven to 400°F (200°C). The trickiest part of this method is often peeling the squash. To make it easier, you can microwave the whole squash for 2-3 minutes to slightly soften the skin, or carefully use a sharp vegetable peeler.
- Peel and Trim: Using a sturdy Y-peeler, carefully peel the tough outer skin off the butternut squash. Be mindful of its slippery nature. Once peeled, trim off the top stalk and the very bottom end of the squash.
- Halve and Seed: Place the peeled squash on your cutting board. Cut it in half lengthwise. Use a metal spoon to scoop out all the seeds and stringy pulp.
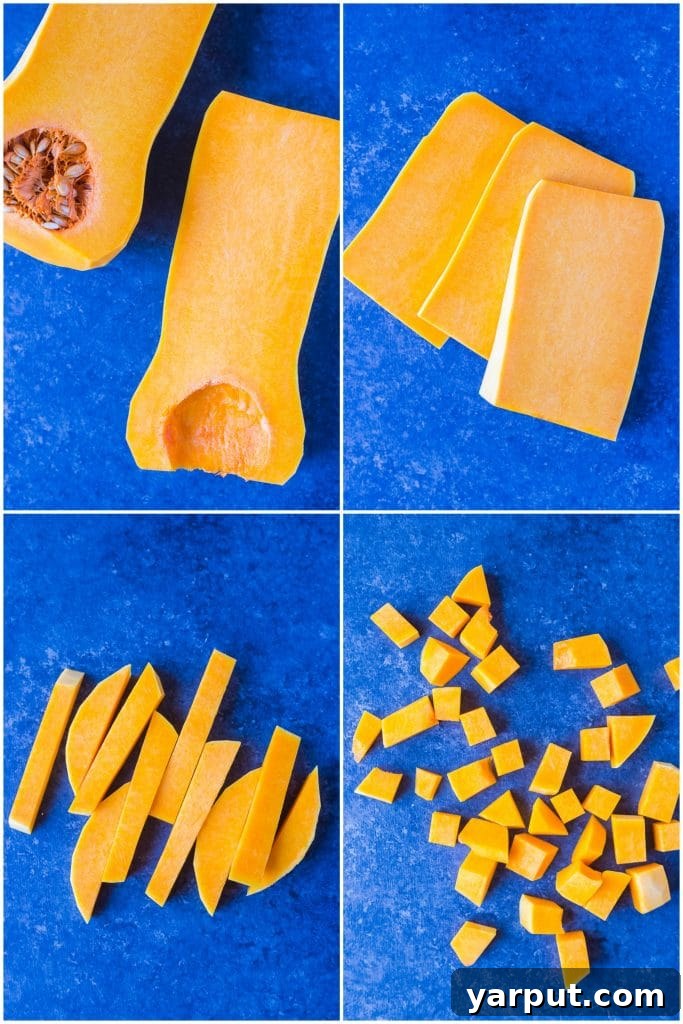
- Cut into Cubes (The Detailed Way): This part allows for some flexibility, but here’s a reliable method for even cubes:
- First, cut the squash in half just above the bulbous bottom where the seeds were, separating the neck from the base.
- Take the neck portion and slice it lengthwise into about 1/2-inch thick planks.
- Stack these planks and cut them into 1/2-inch wide strips (like thick French fries).
- Finally, cut the strips into 1/2-inch bite-sized cubes.
- For the bulbous bottom, you can cut it into wedges first, then peel each wedge if you prefer, or simply cut it into larger pieces and then into cubes, matching the size of the neck cubes as best as possible. Consistency in size is key for even roasting.
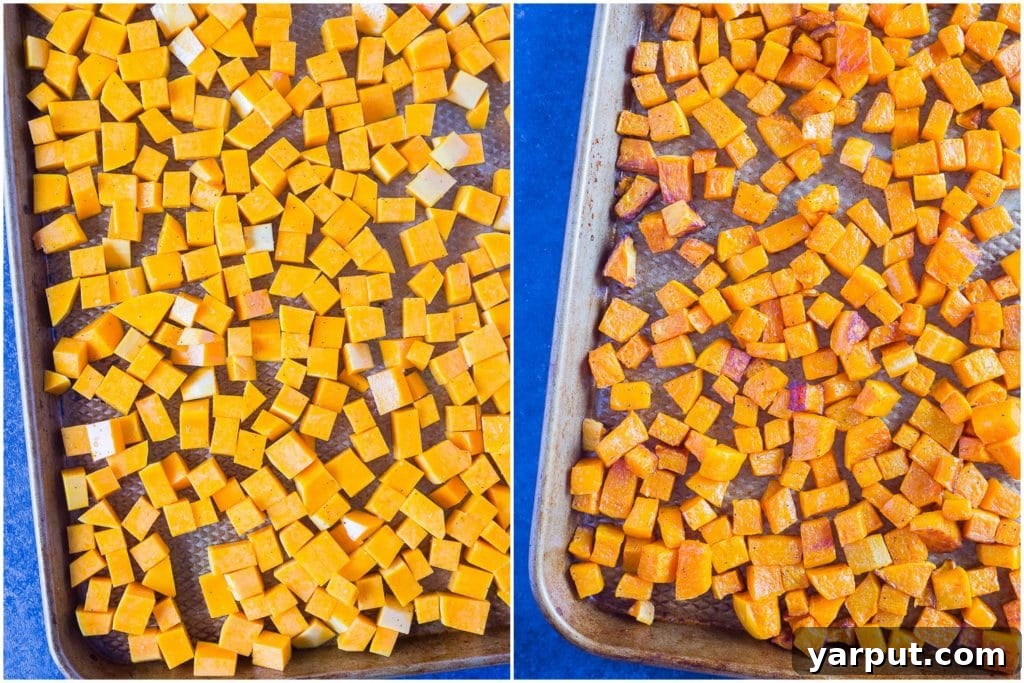
- Season the Cubes: Place the butternut squash cubes in a large bowl or directly onto a spacious baking sheet. Drizzle generously with olive oil and toss until all the cubes are evenly coated. Season with salt and pepper to taste. Don’t be afraid to get creative here! Try adding dried rosemary, thyme, sage, smoked paprika, a pinch of chili powder, or for a sweeter profile, cinnamon and a touch of maple syrup.
- Roast Until Caramelized: Spread the seasoned squash cubes in a single layer on the baking sheet. Avoid overcrowding, as this will steam the squash instead of roasting it, preventing caramelization. If necessary, use two baking sheets. Roast for approximately 30-40 minutes, flipping the cubes halfway through. The squash is done when it’s fork-tender and has beautiful golden-brown, caramelized edges.
- Serve Warm or Cold: Enjoy your perfectly roasted butternut squash cubes immediately as a delicious side dish, or let them cool and add them to salads, grain bowls, or other recipes.
While this method involves a bit more hands-on preparation, the results are well worth the effort. The caramelized bits and tender texture make cubed butternut squash incredibly versatile and delicious.
Making Butternut Squash Puree from Both Methods
Whether you’ve roasted your butternut squash whole or in cubes, making a creamy puree is simple and yields a fantastic base for soups, sauces, or even baby food. Once the squash is roasted and tender, simply scoop the flesh from the halves or transfer the roasted cubes into a food processor. Blend until completely smooth and creamy. If the puree is too thick, add a tablespoon or two of water, vegetable broth, or even a splash of milk (dairy or non-dairy) until you reach your desired consistency. Season with a pinch of salt if needed.
Delicious Ways to Use Roasted Butternut Squash: Recipe Inspiration
Now that you’ve mastered the art of roasting, here are some fantastic ideas and recipes to put your delicious butternut squash to good use:
Ideas for Whole Roasted Butternut Squash:
- Stuffed Butternut Squash: Fill the roasted halves with a savory mixture of grains (like quinoa or rice), vegetables, herbs, and cheese for a complete meal.
- Quinoa Stuffed Butternut Squash from Well Plated
- Creamy Puree Base: Use the puree as a base for rich and velvety soups, pasta sauces, or even a healthier alternative to mashed potatoes.
- Butternut Squash Mac N Cheese from Healthy Nibbles and Bits
- Simple Side Dish: Serve the halves as a beautiful and easy side, perhaps with a pat of butter and a sprinkle of brown sugar.
Ideas for Cubed Roasted Butternut Squash:
- Salads and Grain Bowls: Add cooled roasted cubes to your favorite green salads, or mix them into warm grain bowls with ingredients like farro, quinoa, and other roasted vegetables.
- Winter Quinoa Salad with Butternut Squash
- Roasted Butternut Squash and Sweet Chili Chickpea Salad
- Tacos and Tostadas: Incorporate them into flavorful vegetarian tacos or tostadas for a unique and satisfying meal.
- Roasted Butternut Squash Tostadas
- Roasted Butternut Squash and Black Bean Tacos
- Enchiladas and Meal Prep: They make an excellent filling for enchiladas or a hearty component in meal prep bowls.
- Roasted Butternut Squash Enchilada Meal Prep Bowls
- Soups and Curries: Toss them into stews or curries for added texture and sweetness.
- Breakfast Hash: Combine with potatoes, onions, and spices for a delightful breakfast hash.
Frequently Asked Questions About Roasting Butternut Squash
- Q: Can I prep butternut squash ahead of time?
- A: Absolutely! You can peel and cube butternut squash up to 3-4 days in advance. Store the cubes in an airtight container in the refrigerator until you’re ready to roast. This is a great time-saver for busy weeknights!
- Q: What if my butternut squash is too hard to cut?
- A: If you’re struggling to cut a tough squash, try microwaving it whole for 2-3 minutes. This will slightly soften the skin and flesh, making it much easier and safer to cut. Always use a sharp, heavy knife and place the squash on a stable, non-slip surface.
- Q: Can I roast butternut squash with the skin on?
- A: Yes, you can! For the “whole roasted” method (halves), the skin is typically left on and then scooped out after roasting. The skin of butternut squash is edible once cooked, though some people find it a bit tough or fibrous. If roasting cubes, it’s generally recommended to peel it first for a more pleasant texture.
- Q: What are some other seasonings I can use?
- A: The possibilities are endless! For savory, try smoked paprika, cayenne pepper for a kick, curry powder, or a blend of Italian herbs. For sweet, maple syrup, brown sugar, cinnamon, nutmeg, or even a touch of allspice work wonderfully.
- Q: How do I know when the butternut squash is fully roasted?
- A: The best way to tell is by checking for fork-tenderness. A fork should easily pierce through the thickest part of the squash without much resistance. For cubed squash, you’ll also notice golden-brown, caramelized edges.
Ready to Roast?
Roasting butternut squash is a fundamental skill that unlocks a world of culinary possibilities. Whether you prefer the simplicity of roasting halves or the versatility of cubes, these methods will ensure you achieve perfectly tender and flavorful squash every time. Experiment with different seasonings, pair it with various dishes, and enjoy the wholesome goodness that butternut squash brings to your table.
Don’t hesitate to give these methods a try and elevate your cooking. If you have any questions or unique tips for roasting butternut squash, share them in the comments below!
Tag @shelikes.food on Instagram and hashtag it #shelikesfood when you make this recipe!