
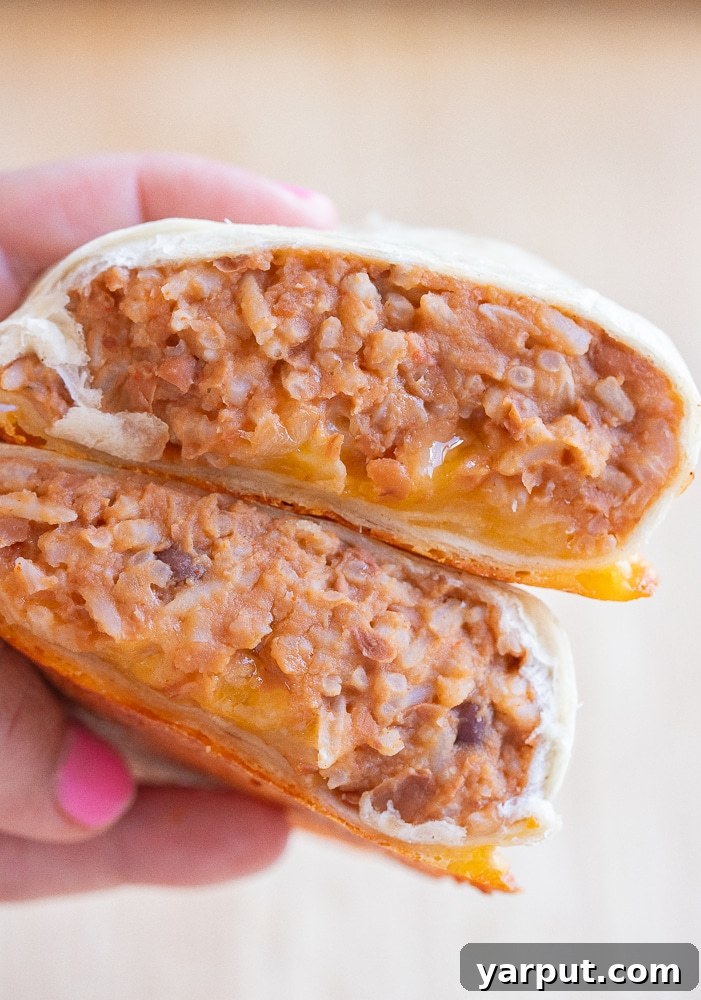
Easy Cheesy Bean and Rice Burritos: Your Go-To Vegetarian Meal Prep Solution
These Cheesy Bean and Rice Burritos are incredibly easy to prepare, making them an ideal choice for a delicious weeknight dinner that the entire family will enjoy. This versatile vegetarian recipe primarily uses readily available pantry staples, making it a fantastic option for those who love to meal prep. Whip up a large batch of these hearty burritos and freeze them for busy days when time is short. Serve them alongside crisp chips and a refreshing dip, or with a fresh salad for a complete and satisfying meal.
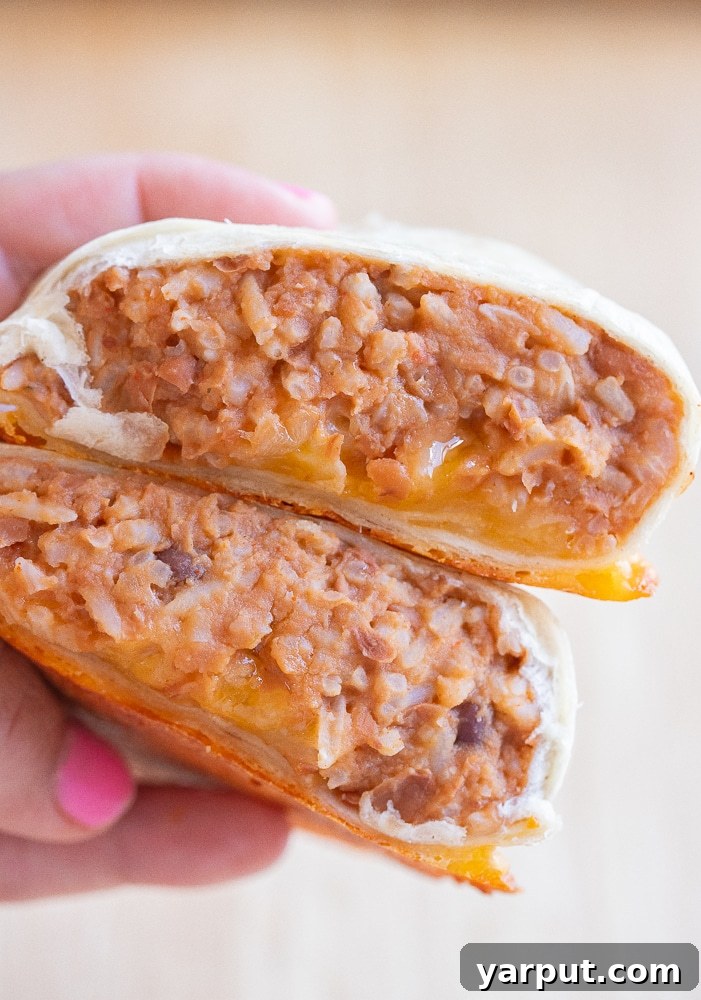
Burritos hold a special place in my heart due to their sheer simplicity and the fact that I almost always have the necessary ingredients on hand. While I often opt for a classic beans and cheese combination, incorporating rice truly elevates them, adding substantial bulk and making them even more satisfying. My Cheesy Bean and Rice Burritos are a powerhouse of protein and fiber, ensuring you feel full and energized. Pair them with a vibrant side salad or a medley of roasted vegetables for a wholesome and effortless meal option that you can feel truly good about serving.
Why You’ll Absolutely Love These Cheesy Burritos
These aren’t just any burritos; they’re a culinary revelation designed for convenience, flavor, and practicality. Here’s why they’re destined to become a staple in your kitchen:
- Effortless to Prepare – For those of us who regularly cook rice, chances are you often have leftover rice chilling in the refrigerator, ready for its next culinary adventure. Even if you need to cook rice specifically for this recipe, the process remains wonderfully straightforward. The heart of these burritos involves simply combining cooked rice, creamy refried beans, flavorful salsa, and a blend of aromatic spices. This mixture is then generously rolled into a large, pliable flour tortilla with a generous helping of cheese. A quick bake in the oven brings them to crispy, gooey perfection, ready to be devoured immediately or stored for future enjoyment. This minimal effort for maximum flavor is what truly makes them shine.
- Perfect for Smart Meal Prepping – Years ago, I found myself in a dedicated frozen burrito phase, but let’s be honest, those store-bought versions often leave much to be desired in terms of flavor and substance. That experience led me to crafting my own, and I haven’t looked back since. This recipe is an absolute dream for meal prepping enthusiasts. You can effortlessly assemble a large batch, wrap them individually, and then tuck them away in the freezer. When hunger strikes or time is tight, simply reheat one in the oven or microwave for a robust, homemade vegetarian meal that comes together with incredible speed and zero fuss. It’s the ultimate grab-and-go solution for healthy eating.
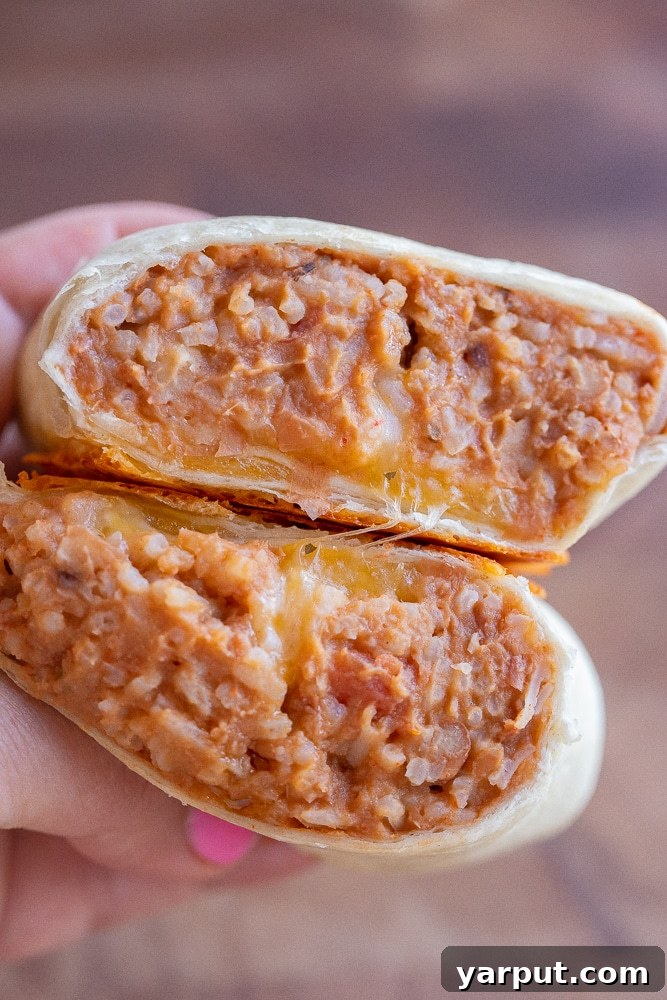
- Bursting with Rich Flavor – Don’t let the short ingredient list fool you; these burritos are anything but bland. Each component plays a crucial role in building a complex and satisfying flavor profile. The salsa contributes a significant depth of taste, offering tanginess and a hint of spice, depending on your choice. Furthermore, the strategic addition of cumin, paprika, and garlic powder works wonders, transforming plain refried beans into a richly seasoned, savory base. To top it all off, a sharp cheddar or a balanced Colby Jack cheese melts into a gooey, savory layer that perfectly complements the earthy beans and rice, ensuring every bite is packed with deliciousness.
Why Your Body Will Thank You for This Protein-Packed Meal
Beyond being incredibly delicious, these Cheesy Bean and Rice Burritos offer a wealth of nutritional benefits that support your overall health and well-being. They’re not just comfort food; they’re smart food.
- Excellent Blood Sugar Regulation – Pinto beans, the star of our refried beans, are an exceptional source of both dietary fiber and plant-based protein. This powerful combination contributes to their remarkably low glycemic index. What does this mean for your body? It means they are digested slowly and steadily, preventing rapid spikes or sudden surges in blood sugar levels. This makes refried pinto beans a particularly intelligent and healthy choice for individuals managing diabetes or anyone aiming to maintain stable energy levels throughout the day. The slow digestion also has the added benefit of keeping you feeling comfortably full for extended periods, reducing the urge to snack unnecessarily.
- Essential for Robust Bone Health – Colby Jack cheese isn’t just for adding a creamy, savory note; it’s a fantastic source of calcium, a mineral that is absolutely vital for maintaining strong and healthy bones. Our skeletal structure is primarily composed of calcium, yet our bodies cannot produce this essential mineral on their own. Therefore, it is critically important that we obtain a sufficient amount of calcium through our diet. Adequate calcium intake helps to maintain optimal bone density, significantly reducing the risk of fractures and supporting the structural integrity of our bodies as we age. Incorporating cheese into your diet is a tasty way to contribute to your long-term bone health.
- Boosts Digestive Health – The high fiber content in beans and rice plays a crucial role in promoting a healthy digestive system. Dietary fiber aids in regular bowel movements, preventing constipation and supporting a balanced gut microbiome. A healthy gut is linked to improved immunity, better mood, and overall well-being.
- Sustained Energy Release – The complex carbohydrates found in rice, combined with the protein and fiber from beans, provide a steady release of energy. Unlike simple sugars that lead to quick energy spikes followed by crashes, this meal helps maintain stable energy levels, making it a great option for lunch or dinner to power you through your day without the post-meal slump.
Essential Cheesy Bean and Rice Burrito Recipe Ingredients
Crafting the perfect burrito begins with selecting quality ingredients. Here’s a deeper look into what you’ll need and some tips for choosing the best options:
- Refried Beans – For this recipe, I utilized one can of classic refried pinto beans, which offer a wonderfully creamy texture and earthy flavor. However, if you prefer, black refried beans make an excellent alternative and will lend a slightly different, yet equally delicious, flavor profile. You have the flexibility to use either high-quality store-bought refried beans for convenience or, for an extra touch of homemade goodness, you can prepare your own from scratch.
- Cooked Rice – My preference for these burritos leans towards cooked white rice, which provides a soft, neutral base that complements the other strong flavors. However, feel free to experiment with brown rice for added fiber and a nuttier taste, or even quinoa if you’re looking for a higher protein, gluten-free grain option. Just ensure your chosen grain is fully cooked and slightly cooled before mixing.
- Salsa – The beauty of this recipe lies in its adaptability, and that extends to your choice of salsa. Use any variety you happen to have on hand, whether it’s mild, medium, or hot. I personally love incorporating a chunky bean and corn salsa when making these burritos. This choice is fantastic because it effortlessly introduces additional textures and flavors (like sweet corn and extra beans) without the need for purchasing extra ingredients. For those who enjoy a bit of heat, opt for a hot salsa; otherwise, a mild variety works perfectly.
- Flavorful Spices – To truly elevate the taste of canned refried beans, I highly recommend enhancing them with a blend of ground cumin, sweet paprika, pungent garlic powder, and savory onion powder. These spices collectively add depth, warmth, and an authentic Mexican-inspired essence to the filling. While this step is technically optional, especially if you don’t keep these spices regularly stocked, it makes a significant difference in the overall flavor of your burritos and is strongly encouraged for the best results.
- Shredded Cheese – My go-to choice for these burritos is a block of Colby Jack cheese. I adore it because it offers the best of both worlds – the mild, creamy texture of Colby combined with the distinctive, semi-hard characteristics of Monterey Jack. If you’re mindful of your budget, purchasing a block of cheese and shredding it yourself is often more cost-effective than buying pre-grated varieties, which also tend to contain anti-caking agents. However, any good melting cheese like cheddar, Monterey Jack, or a Mexican blend will work wonderfully.
- Tortillas – For generously sized, satisfying burritos, I find that large, “burrito-sized” flour tortillas are ideal. However, you can certainly use any kind of tortilla you prefer. Medium-sized flour tortillas are fantastic for creating kid-friendly portions or for a lighter meal. Keep in mind that gluten-free or corn tortillas might not be as pliable or fold as easily as traditional flour tortillas, but they will still hold the delicious filling and provide a great alternative for different dietary needs.
- Cooking Spray – A light mist of cooking spray helps the tortillas achieve a beautiful golden-brown color and a slightly crispy texture during baking.
Step-by-Step Guide: How To Make Vegetarian Bean and Rice Burritos
Follow these simple instructions to create delicious, homemade cheesy bean and rice burritos that are perfect for any occasion:
- Prepare Your Oven and Baking Sheet: Begin by preheating your oven to a robust 400 degrees Fahrenheit (200 degrees Celsius). While the oven heats, take a medium-sized baking sheet and line it thoroughly with parchment paper. This crucial step prevents sticking and ensures easy cleanup. Set the prepared baking sheet aside.
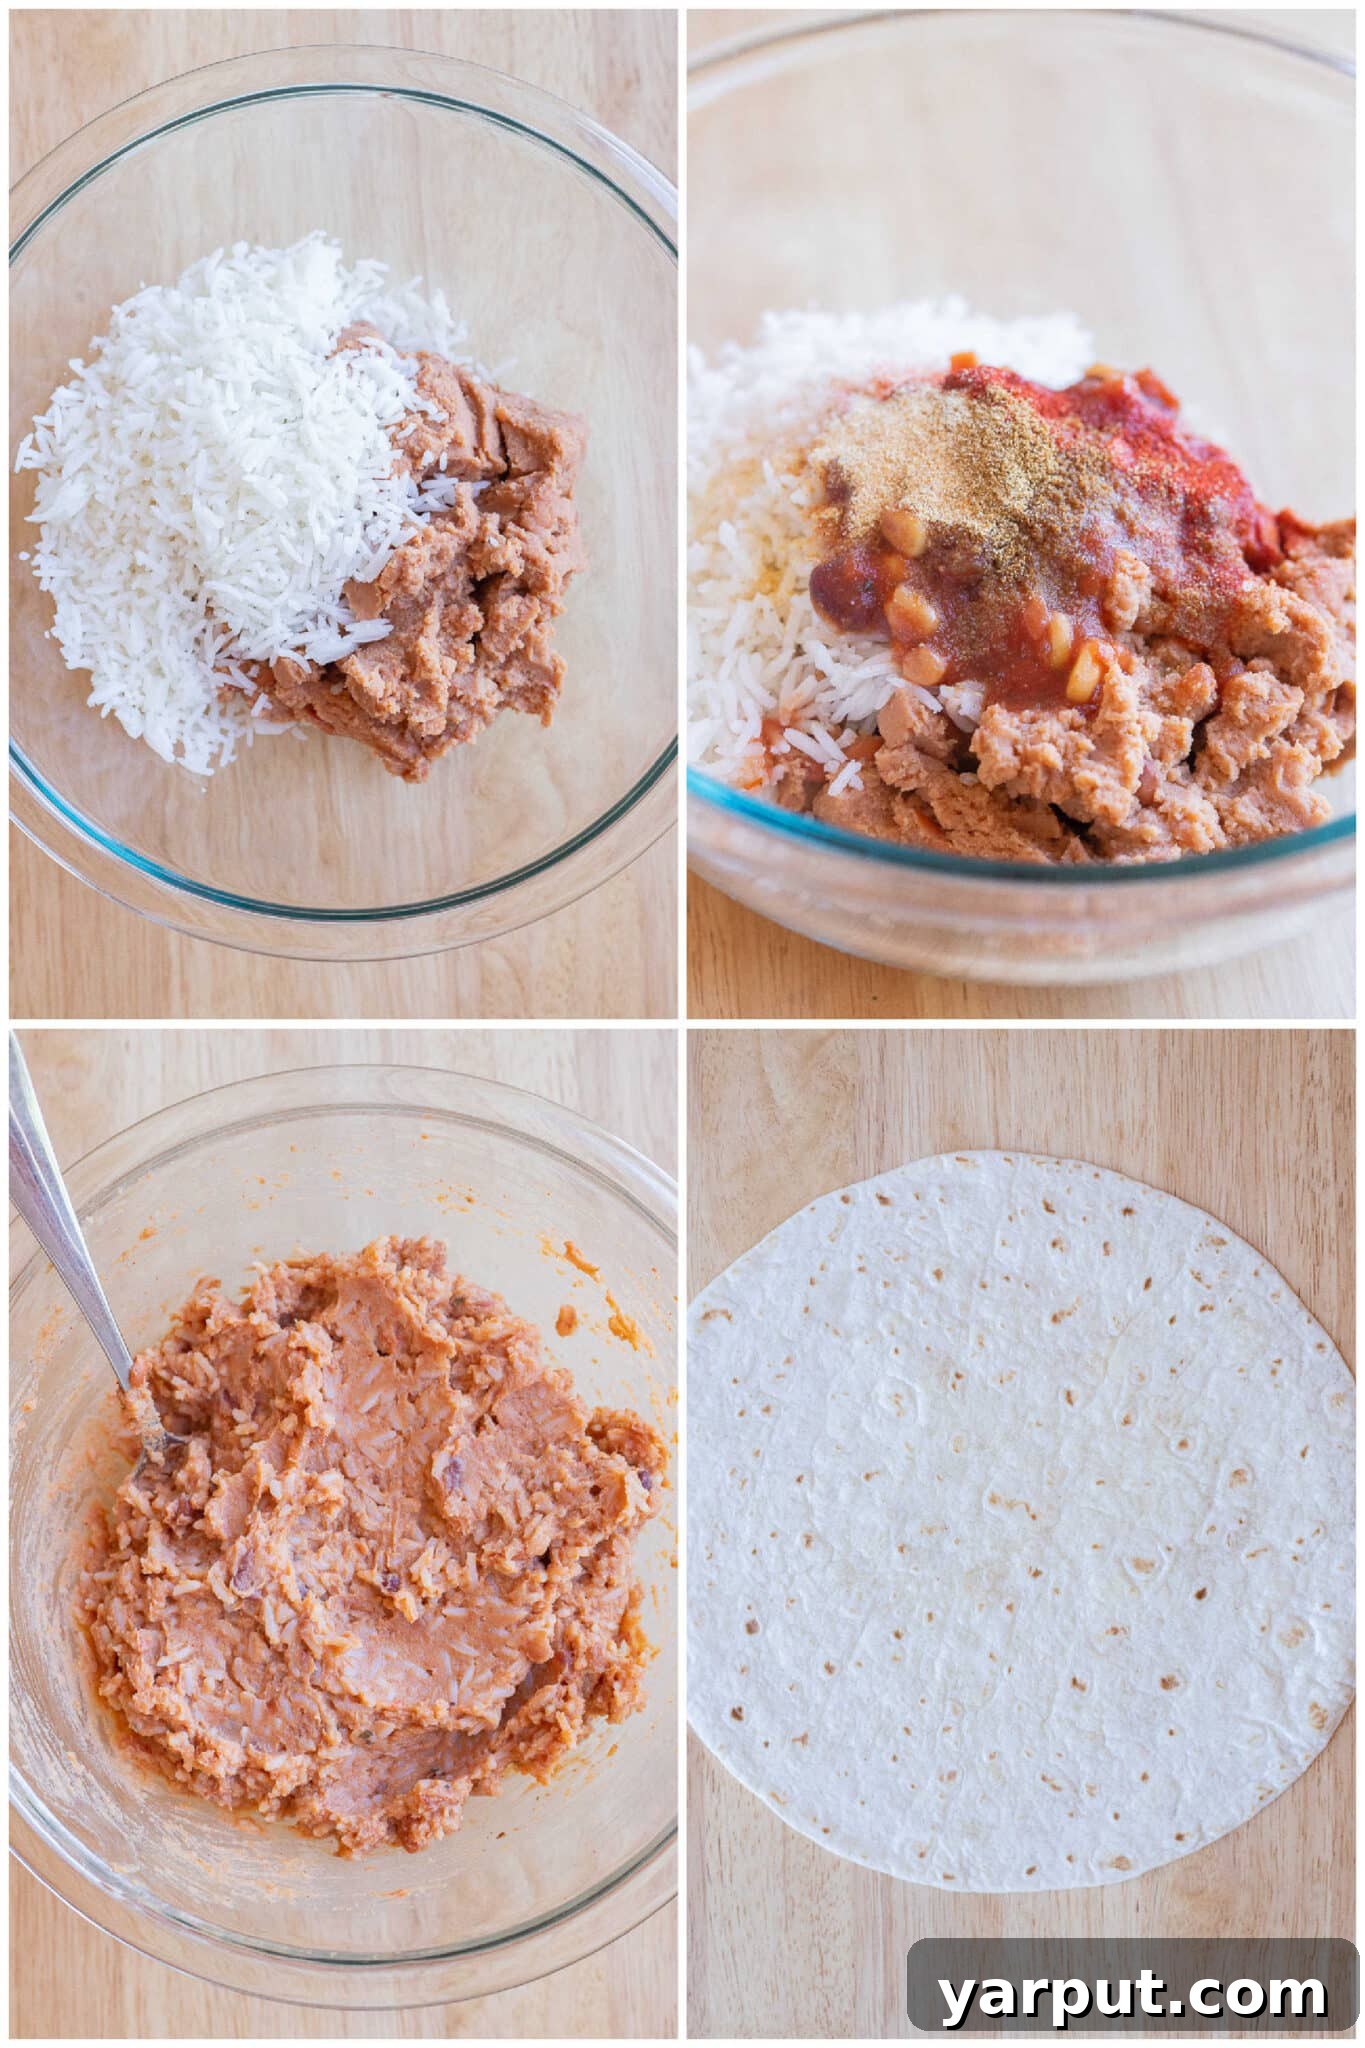
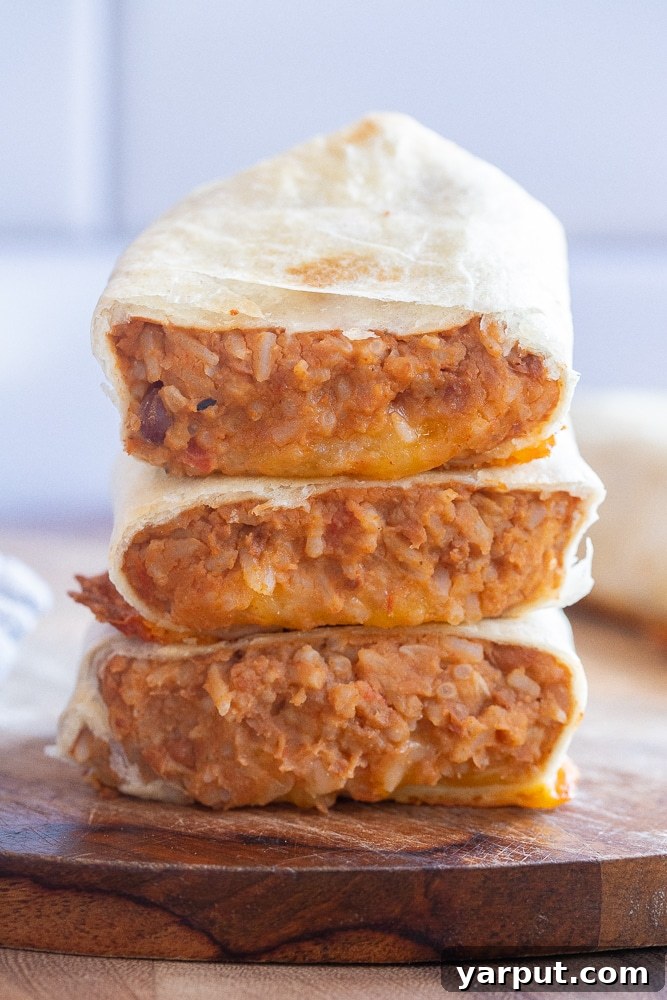
- Combine the Flavorful Filling: Grab a large mixing bowl – you’ll need plenty of space to work. Into this bowl, add the creamy refried beans, your perfectly cooked rice (white or brown), the chunky salsa of your choice, ground cumin, sweet paprika, granulated garlic, and a pinch of salt. Using a sturdy spoon or spatula, thoroughly mix all these ingredients together until they are completely combined and uniform in texture. This ensures every bite of your burrito will be bursting with flavor.
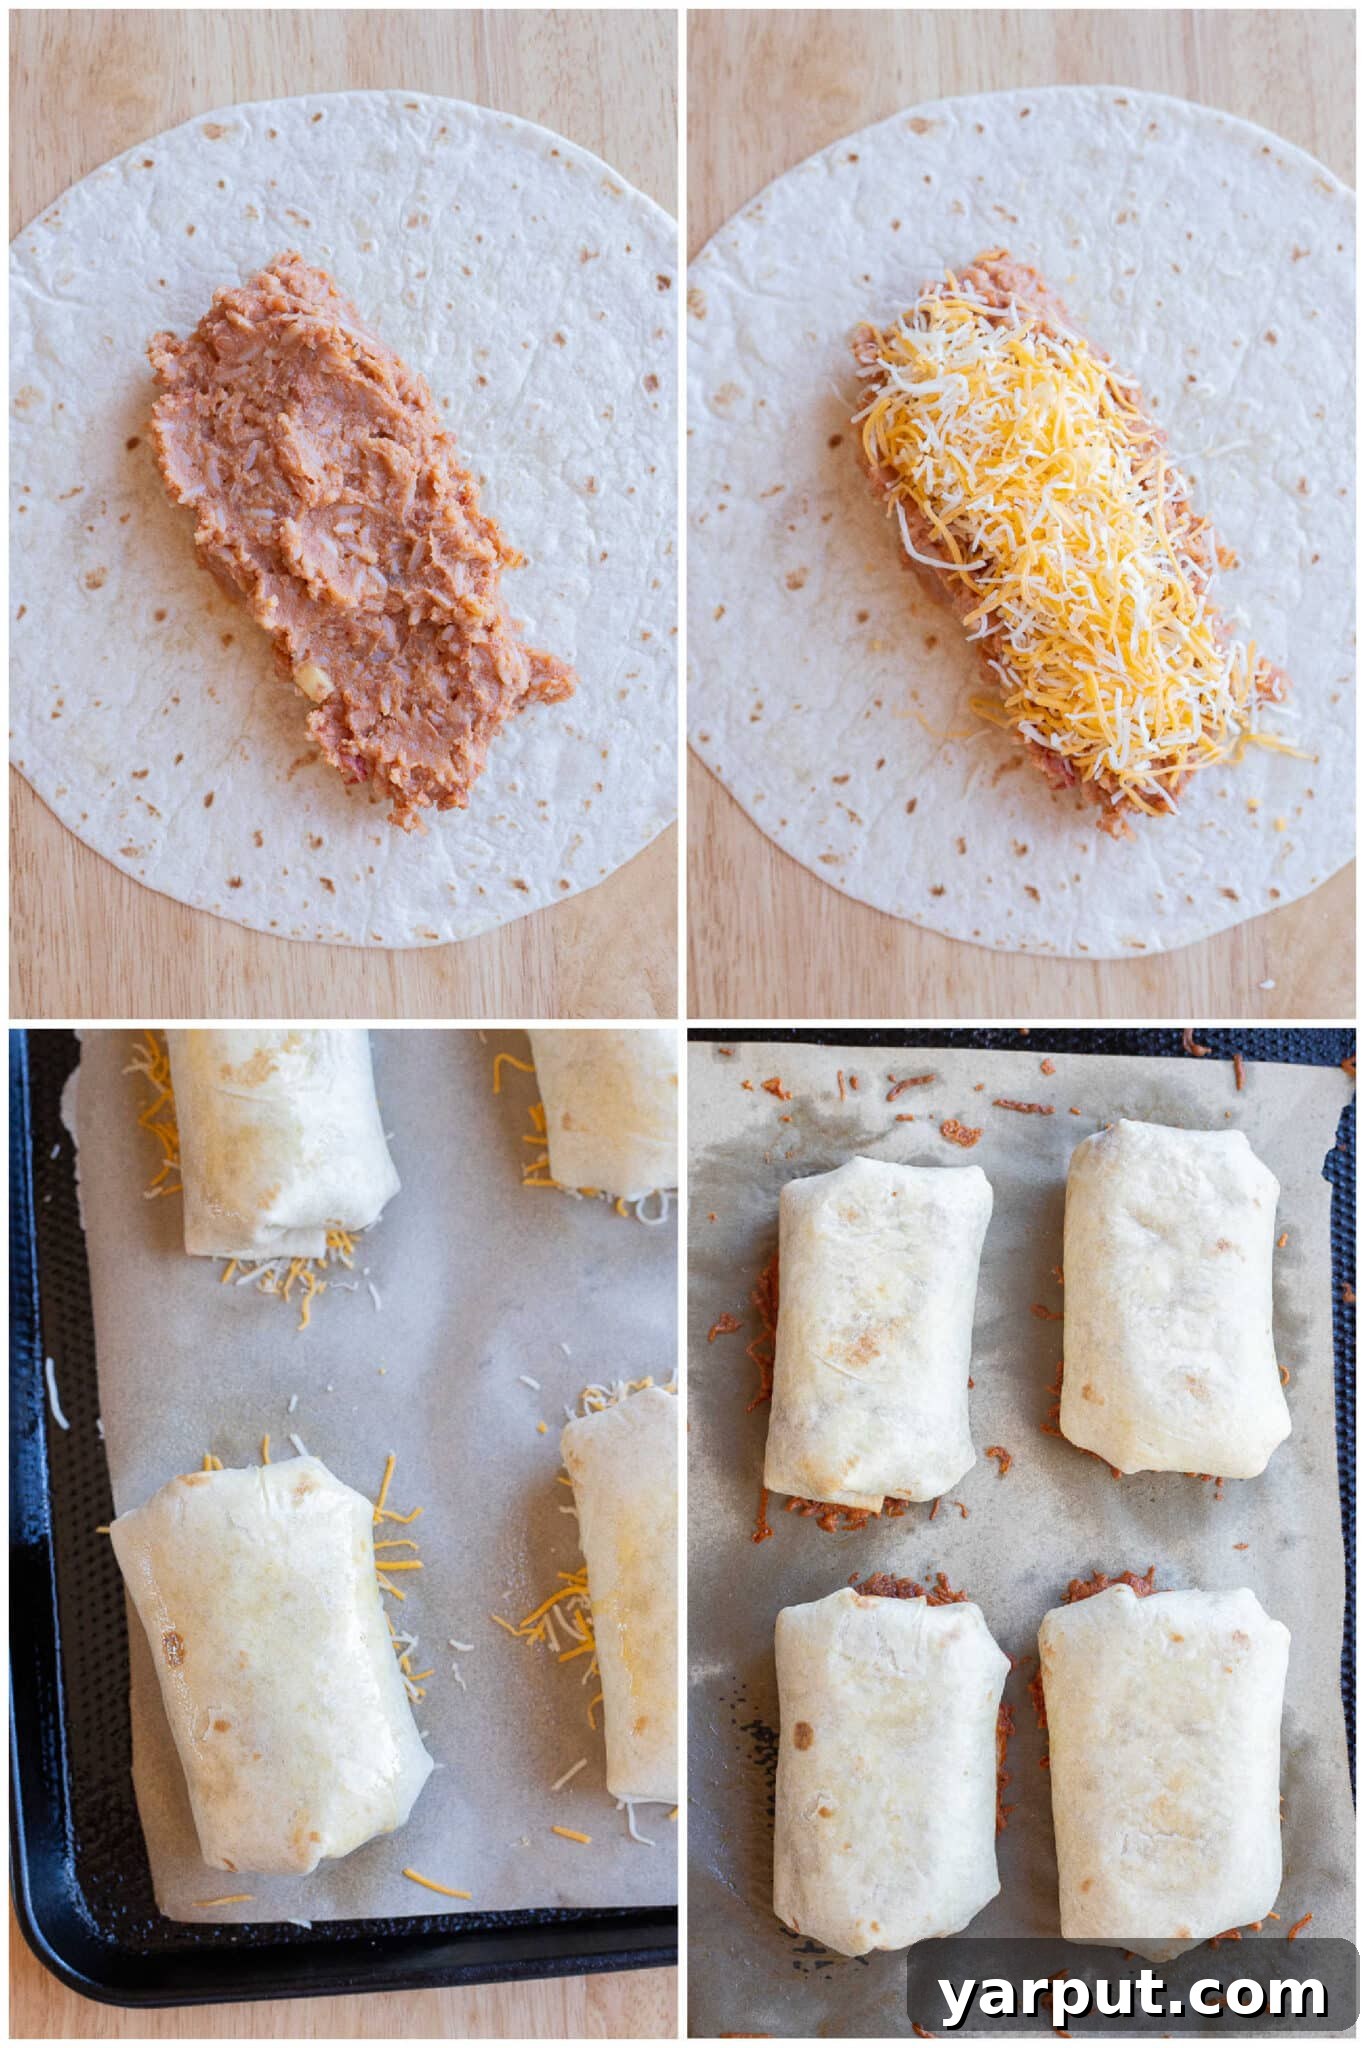
- Warm and Fill the Tortillas: To make your tortillas more pliable and easier to roll without tearing, lightly warm them. You can do this by heating each flour tortilla for a few seconds in the microwave (about 10-15 seconds per tortilla) or by quickly passing them over a dry, hot pan on the stovetop for a few seconds per side. Once warmed, lay one tortilla flat on a clean surface. Spoon about 1/4 of the bean and rice mixture onto the center of the tortilla, shaping it into a small log down the middle.
- Add Cheese and Roll Tightly: Generously top the bean and rice log with approximately two tablespoons of your shredded cheese. Now comes the art of rolling! Carefully fold the sides of the tortilla inwards towards the center, over the filling. Then, starting from the bottom, tightly roll the burrito upwards, ensuring all the filling is encased. The goal is a snug, compact burrito that won’t unravel during baking.
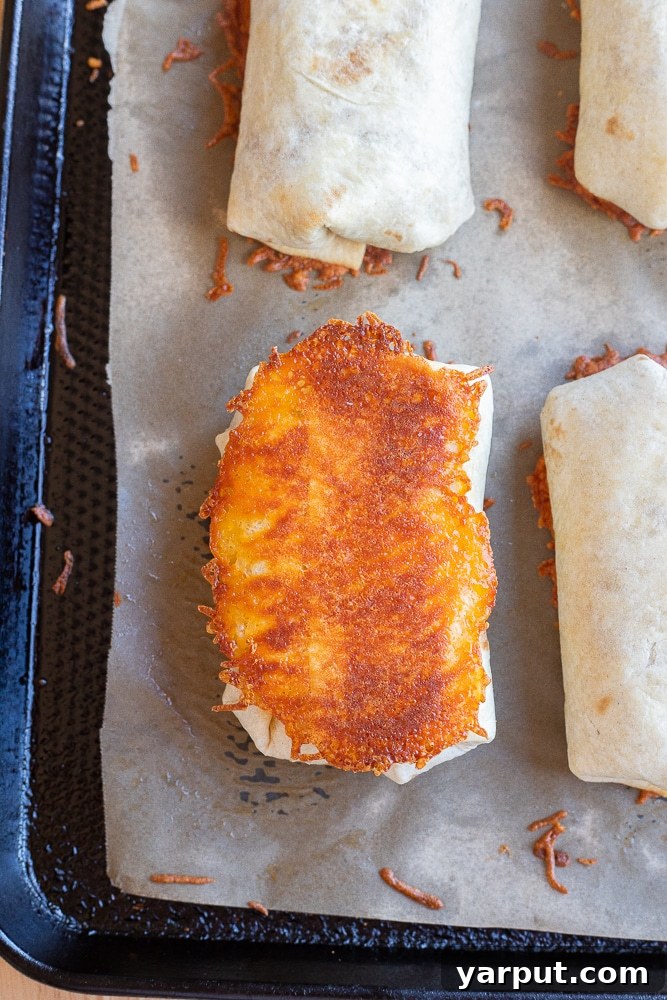
- Optional Crispy Cheese Bottom (Highly Recommended!): This step is completely optional but highly recommended for an extra layer of deliciousness and texture. Sprinkle a small amount of extra shredded cheese directly onto the parchment paper on your baking sheet, precisely where each burrito will be placed. Position each rolled burrito seam-side down directly on top of this sprinkled cheese. Finish by lightly spraying the top of each burrito with cooking spray; this helps achieve a beautiful golden-brown crust.
- Bake to Golden Perfection: Carefully transfer the baking sheet, with your burritos, into the preheated oven. Bake for approximately 15 to 20 minutes, or until the cheese inside is gloriously melted and gooey, and the cheese on the bottom has transformed into a wonderfully crispy, golden-brown crust. Once baked, remove the burritos from the oven and allow them to cool for a few minutes before handling. This cooling period helps the filling set and prevents burns. Serve them hot with your favorite toppings and enjoy!
Serving Suggestions for Your Cheesy Bean and Rice Burritos
These burritos are fantastic on their own, but they truly shine when paired with complementary sides and toppings. Consider these options to elevate your meal:
- Classic Toppings: A dollop of sour cream or Greek yogurt, a scoop of fresh guacamole, extra salsa (mild or spicy!), thinly sliced green onions, or a sprinkle of fresh cilantro.
- Side Dishes: A vibrant green salad with a light vinaigrette, crunchy tortilla chips with queso or a fresh pico de gallo, Mexican corn salad (Esquites), or even a simple side of seasoned black beans.
- Hot Sauce: For those who love an extra kick, a drizzle of your favorite hot sauce can take these burritos to the next level.
Recipe Frequently Asked Questions
Here are answers to common questions about making and enjoying these delightful burritos:
- How can I make these burritos gluten-free? To easily adapt this recipe for a gluten-free diet, simply swap out the traditional flour tortillas for large gluten-free wraps that are specifically designed for burritos. Alternatively, you can use corn tortillas, though they may not fold as smoothly as flour wraps, they will still hold the delicious filling beautifully.
- Can I make this recipe vegan? Absolutely! To transform these cheesy burritos into a delicious vegan meal, you only need to make one simple substitution: use your favorite high-quality vegan cheese substitute. Ensure your refried beans are vegan-friendly (some brands contain lard, so always check the label), and you’re all set!
- What kind of rice should be used? While I often prefer using white rice for its tender texture and mild flavor, brown rice is an excellent and equally delicious option that adds a nutty taste and extra fiber. For those looking for an alternative grain, quinoa or even a blend of grains like farro can be used to create a unique and equally satisfying burrito filling.
- How long do leftovers last? When stored properly in an airtight container in the refrigerator, any leftover Cheesy Bean and Rice Burritos will maintain their freshness and delicious taste for approximately 4 to 5 days. They reheat wonderfully in either the microwave (for a quick meal) or the oven (for a crispier exterior).
- Are these burritos freezer-friendly? Yes, these burritos are an exceptional freezer-friendly recipe, making them perfect for batch cooking and meal prep. To freeze, assemble each burrito as directed, then individually wrap each one tightly in plastic wrap, followed by a layer of aluminum foil for extra protection against freezer burn. Store the wrapped burritos together in a large ziplock bag or a freezer-safe container. For the best reheating results, bake frozen burritos in the oven until heated through and crispy.
- Can I add vegetables to the filling? Absolutely! Feel free to customize your burritos with finely diced bell peppers, sautéed onions, corn kernels, or even a handful of spinach for added nutrients and flavor. Cook any raw vegetables before mixing them into the bean and rice mixture.
Have a question I didn’t answer? Ask me in the comment section below, and I will get back to you ASAP!
Looking For More Easy Mexican-Inspired Recipes?
If you loved these burritos, be sure to explore more of our delicious and simple Mexican-inspired dishes:
Easy Mexican Black Beans
Cheesy Potato Taquitos
Vegan Carnitas with Mushrooms
One Pot Stove Top Enchiladas
Easy Vegan Black Bean Tacos
Print

Cheesy Bean and Rice Burritos
5 Stars
4 Stars
3 Stars
2 Stars
1 Star
No reviews yet
- Author: She Likes Food
Total Time: 35 minutes
Yield: 4 1x
Diet: Vegetarian
Description
These Cheesy Bean and Rice Burritos are incredibly easy to make and serve as the perfect quick, satisfying weeknight dinner that the whole family will adore. This budget-friendly vegetarian recipe relies on mostly common pantry staples, making it a fantastic option for efficient meal prepping. Prepare a generous batch of these hearty burritos and store them in your freezer for those exceptionally busy days when you need a delicious meal in a flash. For a complete and wholesome dining experience, serve them with your favorite chips and dip or a fresh, crisp side salad.
Ingredients
Scale
- 2 cups creamy refried beans (pinto or black, check for vegan if desired)
- 1 1/2 cups cooked rice (white, brown, or quinoa)
- 1/3 cup chunky salsa (mild or hot, with or without corn and beans)
- 1/2 teaspoon ground paprika
- 1/2 teaspoon ground cumin
- 1/2 teaspoon granulated garlic (or garlic powder)
- 1/4 teaspoon salt (adjust to taste based on salsa and beans)
- 4 large burrito-sized flour tortillas
- 3/4 cup shredded cheese (Colby Jack, cheddar, or your favorite melty cheese), plus extra for crispy bottom (optional)
- Cooking spray (for coating burritos)
Instructions
- Preheat Oven & Prepare Sheet: Preheat your oven to 400°F (200°C). Line a medium-sized baking sheet with parchment paper to prevent sticking and ensure easy cleanup. Set it aside.
- Mix the Filling: In a large mixing bowl, combine the refried beans, cooked rice, chunky salsa, ground cumin, paprika, granulated garlic, and salt. Stir everything thoroughly until all ingredients are well incorporated and the mixture is uniform.
- Warm & Fill Tortillas: If desired, gently warm the flour tortillas for a few seconds in the microwave or on a dry pan to make them more pliable and easier to roll. Lay one tortilla flat on a clean surface. Spoon about 1/4 of the bean and rice mixture onto the center of the tortilla, forming it into a small log shape.
- Add Cheese & Roll Burritos: Top the bean and rice mixture with approximately 2 tablespoons of shredded cheese. Carefully fold the short sides of the tortilla inwards over the filling, then tightly roll the burrito from the bottom upwards to create a neat, secure package. Repeat for the remaining tortillas.
- Optional Crispy Cheese Bottom: For an extra layer of flavor and a delightful crispy texture, sprinkle a small amount of additional shredded cheese onto the parchment paper where each burrito will be placed. Position each rolled burrito seam-side down on top of the cheese. Lightly spray the top of each burrito with cooking spray to help with browning.
- Bake Until Golden: Place the baking sheet with the burritos into the preheated oven. Bake for 15-20 minutes, or until the internal cheese is fully melted and gooey, and the cheese on the bottom has formed a delicious, crispy crust. Allow the burritos to cool for a few minutes before serving. Enjoy them hot with your favorite toppings!
Notes
If you choose to omit the crispy cheese layer underneath the burritos, you can certainly add extra shredded cheese directly inside the burrito filling for an equally cheesy experience.
Prep Time: 15 mins
Cook Time: 20 mins
Category: Dinner, Vegetarian
Method: Oven
Cuisine: Mexican Inspired