
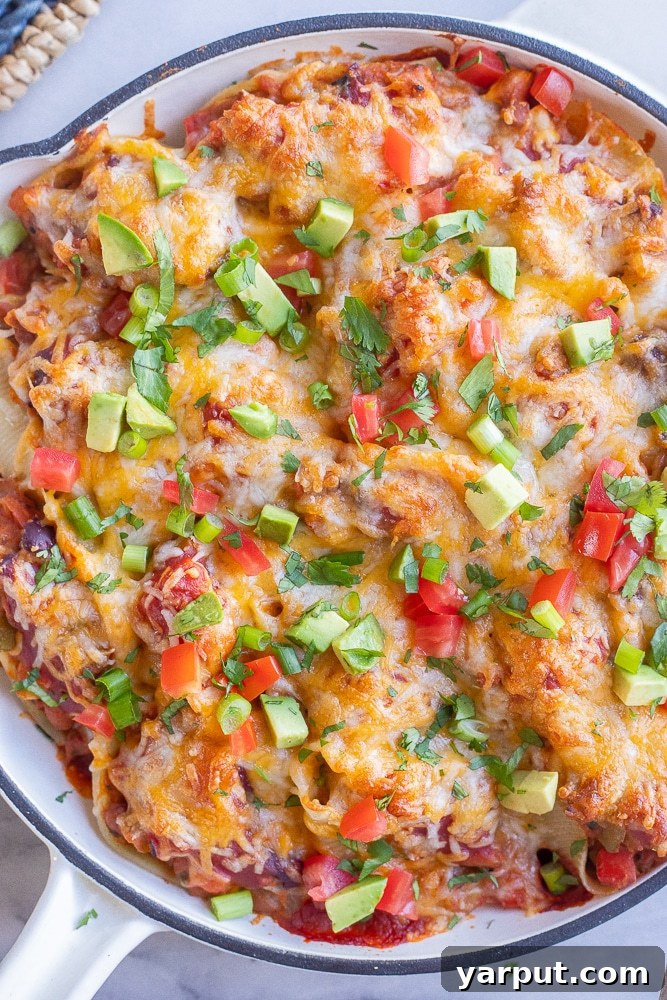
Hearty Vegetarian Chili Cheese Stuffed Shells: The Ultimate Comfort Food Feast
Discover the unparalleled delight of Vegetarian Chili Cheese Stuffed Shells – a truly satisfying vegetarian comfort food that brings together the best of pasta, rich chili, and melted cheese in every bite. Whether you’re using homemade veggie chili or repurposing delicious leftovers, this dish promises a filling and flavorful family dinner experience that will have everyone asking for seconds.
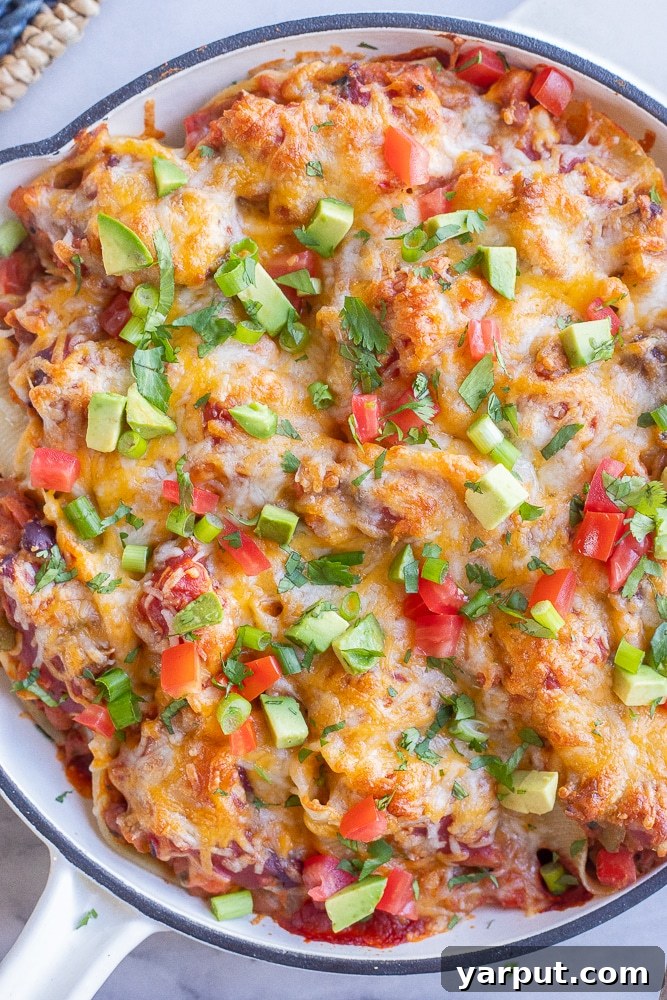
There’s nothing quite like a warm, comforting meal to bring the family together, and these Vegetarian Chili Cheese Stuffed Shells are no exception. Imagine tender pasta shells generously filled with a robust, flavorful vegetarian chili, then baked to perfection under a blanket of gooey, melted cheese. It’s a culinary masterpiece that marries the hearty appeal of a classic chili mac with the elegant presentation of stuffed pasta, creating a dish that’s both satisfyingly wholesome and incredibly indulgent.
Inspired by the beloved flavors of traditional chili and the delightful concept of stuffed shells, this recipe offers a unique and incredibly delicious twist. We’ve loaded our chili with an abundance of fresh vegetables and protein-rich beans, transforming this comfort food into a remarkably healthy and deeply filling dinner option. It’s a wonderful way to enjoy a substantial meal that’s packed with nutrients without compromising on taste. While making stuffed shells might seem a bit more involved than tossing together a simple pasta dish, the effort is undeniably rewarded with a truly spectacular meal that’s well worth every minute in the kitchen. For those who enjoy classic pasta dishes, my traditional vegan stuffed shells recipe is always a hit, but sometimes it’s exciting to explore new flavor horizons, and these chili-infused shells are an adventure for your taste buds.
Key Ingredients for Exceptional Chili Cheese Stuffed Shells & Smart Substitutions
Crafting these delectable stuffed shells starts with a thoughtful selection of ingredients. Each component plays a crucial role in building the layers of flavor and texture that make this dish so irresistible.
- The Chili Base: The heart of this recipe is, of course, the chili. I’ve included a specific chili recipe tailored for these stuffed shells, which is essentially a robust, thick version of my popular vegan chili, but without the added vegetable broth to ensure a denser consistency perfect for stuffing. The thickness prevents the shells from becoming watery and helps the filling hold its shape. For ultimate convenience, you can absolutely use leftover chili from a previous meal, or even good-quality canned chili. Just remember to ensure its consistency is quite thick; if it’s too liquidy, simmer it down a bit to reduce moisture before stuffing.
- Perfect Pasta Shells: We recommend using extra-large shell noodles, often labeled as “jumbo shells” or “conchiglie,” which are ideal for stuffing. These larger shells provide ample space for the savory chili mixture. If you can’t find jumbo shells, manicotti noodles are an excellent alternative and can be easily stuffed. You could even get creative with cannelloni or large rigatoni, though the stuffing method might vary slightly.
- Flavorful Sauce for Baking: A small amount of sauce is essential for coating the bottom of your baking dish, preventing sticking, and adding an extra layer of moisture and flavor. It also provides a delicious topping for each stuffed shell. Options include a mild or spicy chili sauce, a zesty taco sauce, or a rich red enchilada sauce. Each choice will impart a slightly different flavor profile, allowing for customization.
- Irresistible Cheese: For that classic chili-cheese goodness, a generous amount of shredded cheese is a must. I typically use a Fiesta shredded cheese blend for its melty texture and mild, savory flavor, but feel free to choose your favorite. Cheddar, Monterey Jack, or even a spicy Pepper Jack would work wonderfully. If you prefer to keep it dairy-free or vegan, simply use your favorite vegan shredded cheese blend or omit the cheese entirely for a lighter, dairy-free version.
- Fresh & Zesty Toppings: Toppings aren’t just for garnish; they add freshness, crunch, and contrasting flavors that elevate the entire dish. Pile on your favorites! Classic choices include diced avocado for creaminess, fresh diced tomatoes, thinly sliced green onions, and vibrant cilantro. For an extra kick, consider a dollop of sour cream or vegan sour cream, a spoonful of homemade guacamole, a drizzle of hot sauce, or a sprinkling of crushed tortilla chips or crackers for texture. Sliced jalapeños (fresh or pickled) and black olives also make fantastic additions.
Mastering the Art of Vegetarian Chili Cheese Stuffed Shells: A Step-by-Step Guide
Follow these detailed steps to create a show-stopping dish that’s as impressive to look at as it is to eat. The process is straightforward, ensuring delicious results every time.
- Preheat Your Oven: Begin by preheating your oven to 425 degrees Fahrenheit (220 degrees Celsius). You can do this at the very start of your cooking process or just before you’re ready to slide the stuffed shells into the oven.
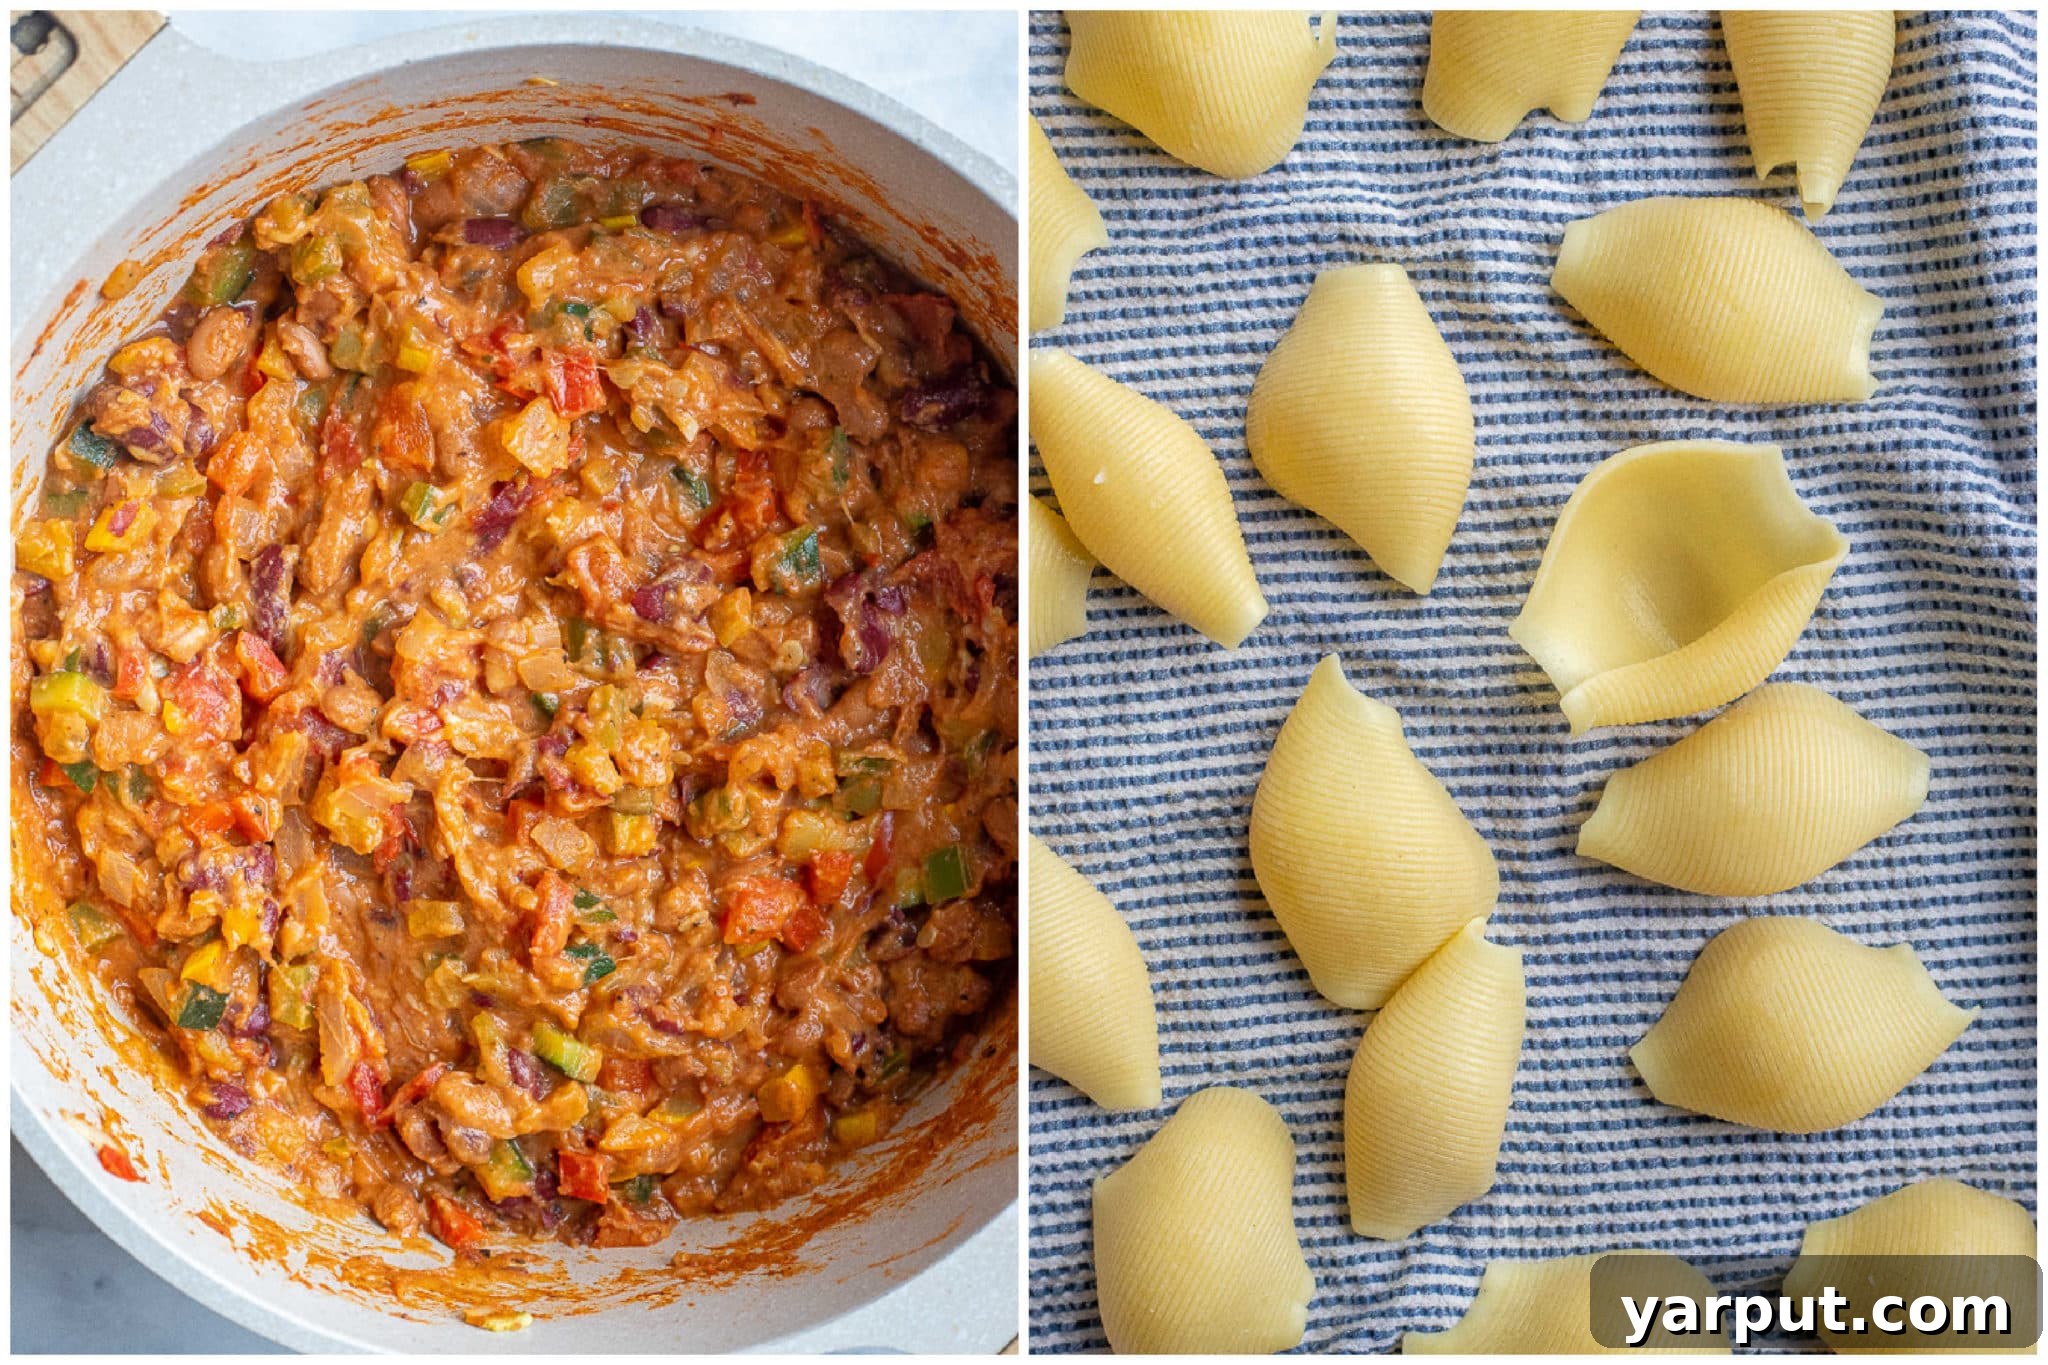
- Craft Your Flavorful Chili: The journey to perfect stuffed shells starts with a rich, thick chili. If you’re using homemade chili, ensure it’s reduced to a thick consistency. For those opting for convenience, leftover or canned chili works wonderfully, provided it’s not too watery. To prepare the chili from scratch: Heat a large pot or Dutch oven over medium heat. Add a touch of olive oil, then introduce your diced yellow onion, red bell pepper, green bell pepper, zucchini, and summer squash along with a pinch of salt. Stir frequently and cook these vegetables until they have significantly softened, which usually takes about 7-10 minutes. This caramelization builds a foundational layer of flavor. Next, stir in the minced garlic and cook for just one more minute until fragrant, being careful not to burn it.
- Build the Chili’s Depth: To the softened vegetables, add the drained and rinsed kidney beans and pinto beans, canned diced tomatoes (with most of their liquid drained), creamy refried beans, and the robust tomato paste. Incorporate all your seasonings: ground cumin, paprika, chili powder, garlic powder, salt, onion powder, Italian seasoning, and black pepper. Mix all these ingredients together thoroughly until well combined. Allow the chili mixture to simmer gently for about 5-10 minutes, letting the flavors meld and deepen. Finally, stir in a generous heaping cup of shredded cheese until it completely melts into the chili, adding a wonderful creaminess. Remove the chili from the heat and set it aside until it’s time to stuff the shells.
- Perfectly Cook Your Pasta Shells: Bring a large pot of salted water to a rolling boil over high heat. Add your extra-large shell pasta. A little trick: add a tablespoon of olive oil to the boiling water with the pasta; this helps prevent the shells from sticking together. Cook the shells according to package directions until they are al dente – tender but still firm to the bite, typically 10-12 minutes. Once cooked, drain the pasta thoroughly and rinse immediately with cold water. This cold rinse halts the cooking process, ensuring the shells remain al dente and are easier to handle without tearing. Lay the cooled shells out on a clean kitchen towel; this helps them dry slightly, prevents sticking, and makes it easier to open them up for stuffing.
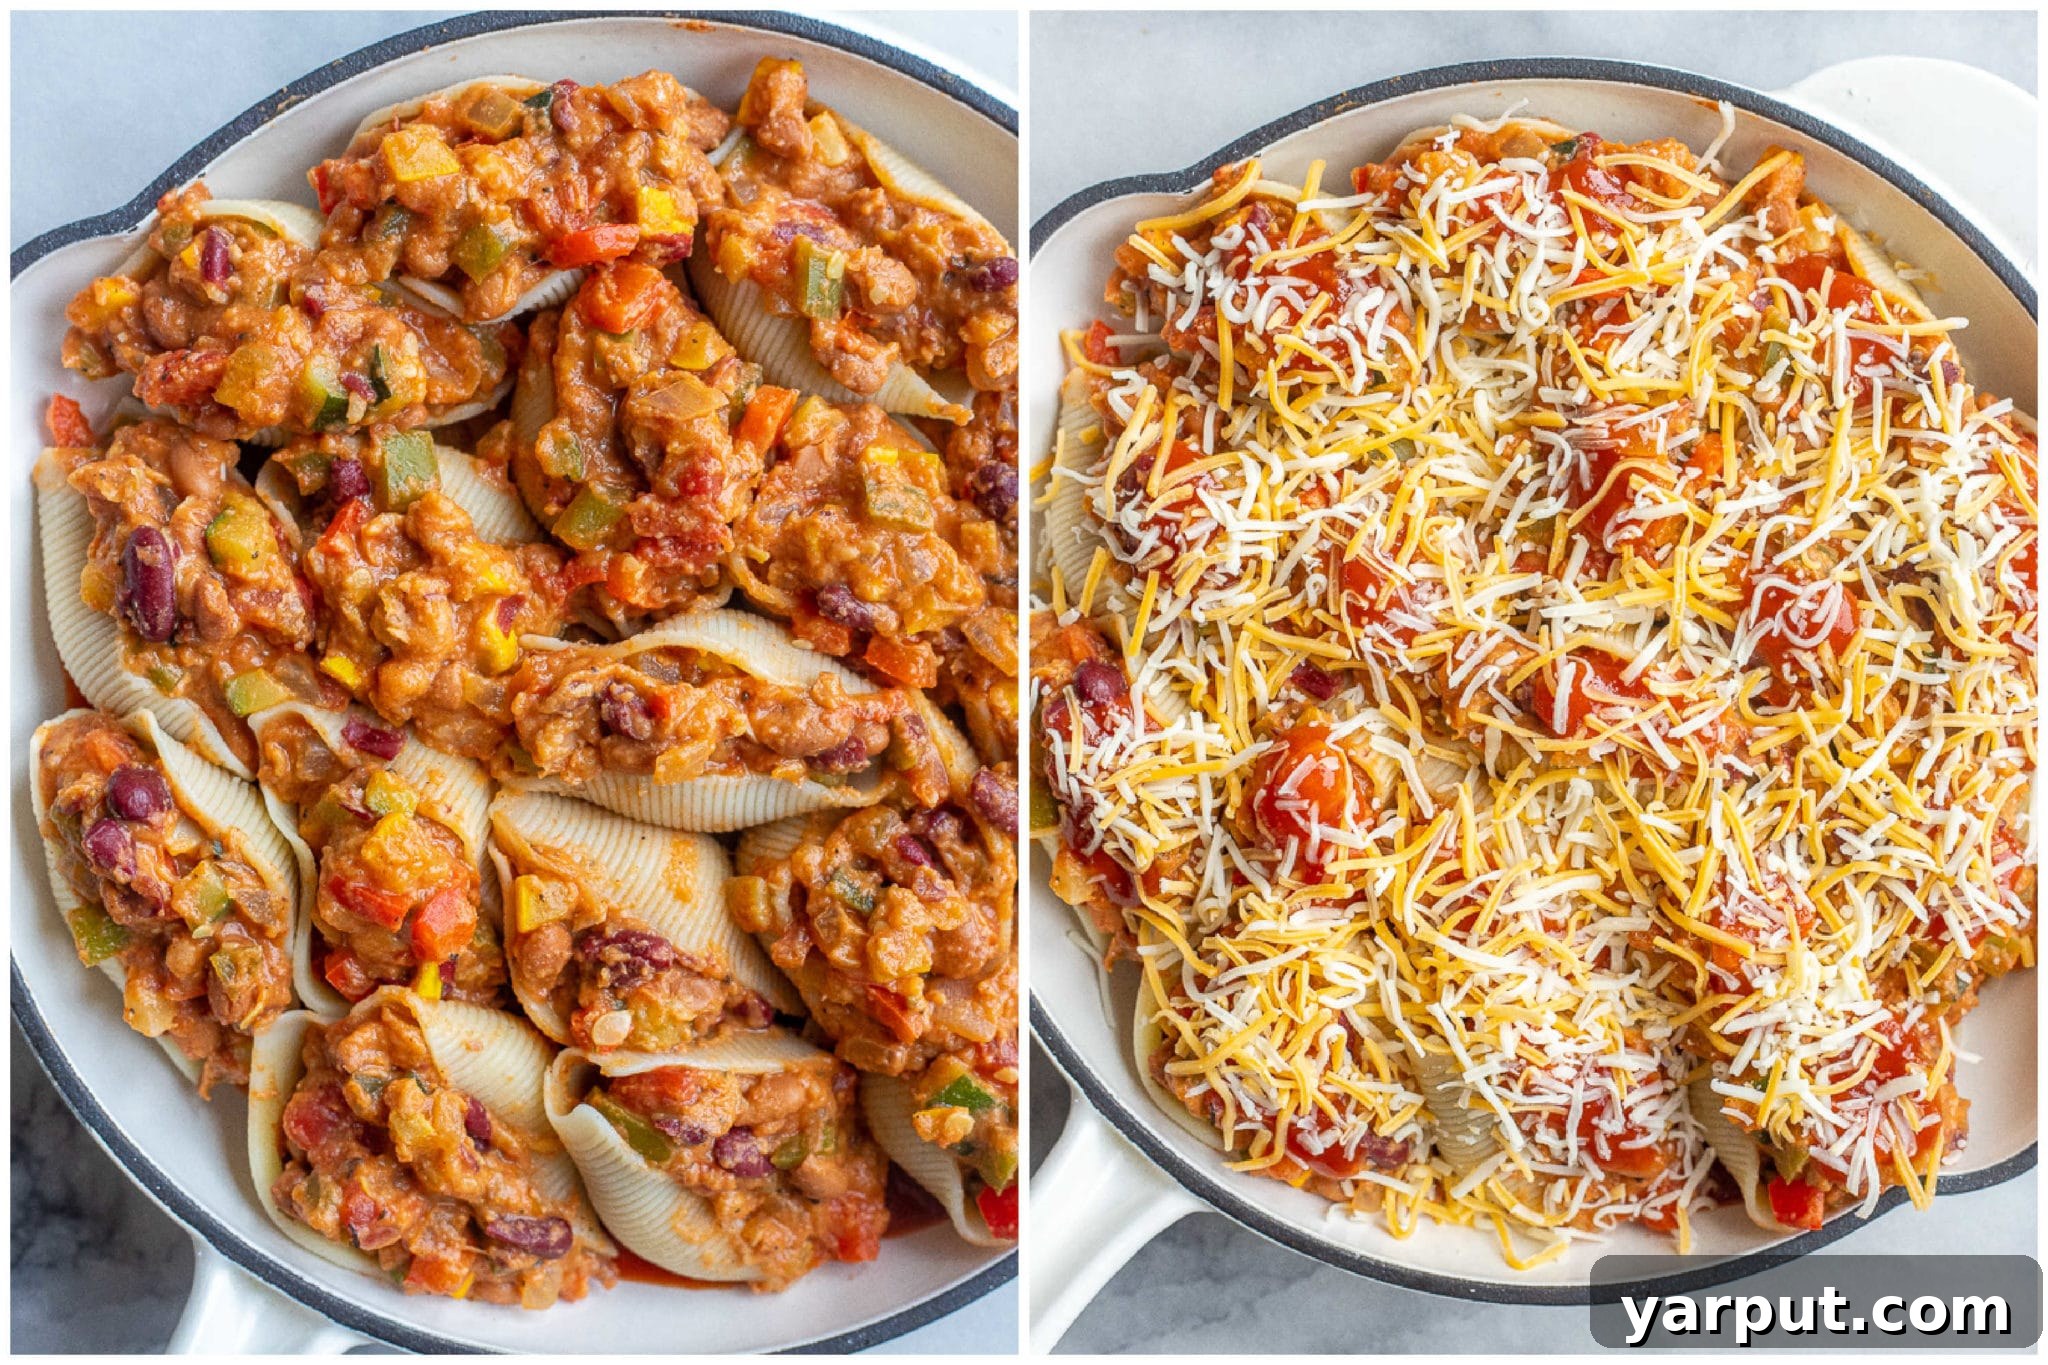
- Assemble Your Stuffed Shells: Pour about 1/2 cup of your chosen chili, taco, or enchilada sauce into the bottom of a large baking dish, spreading it evenly to create a flavorful base. Using a spoon, carefully fill each cooked shell with the prepared chili mixture. Aim for about two tablespoons of filling per shell, or enough to fill it without overstuffing. Arrange the filled shells snugly in a single layer within the baking dish. You can pack them in as tightly or loosely as you prefer, depending on your dish size.
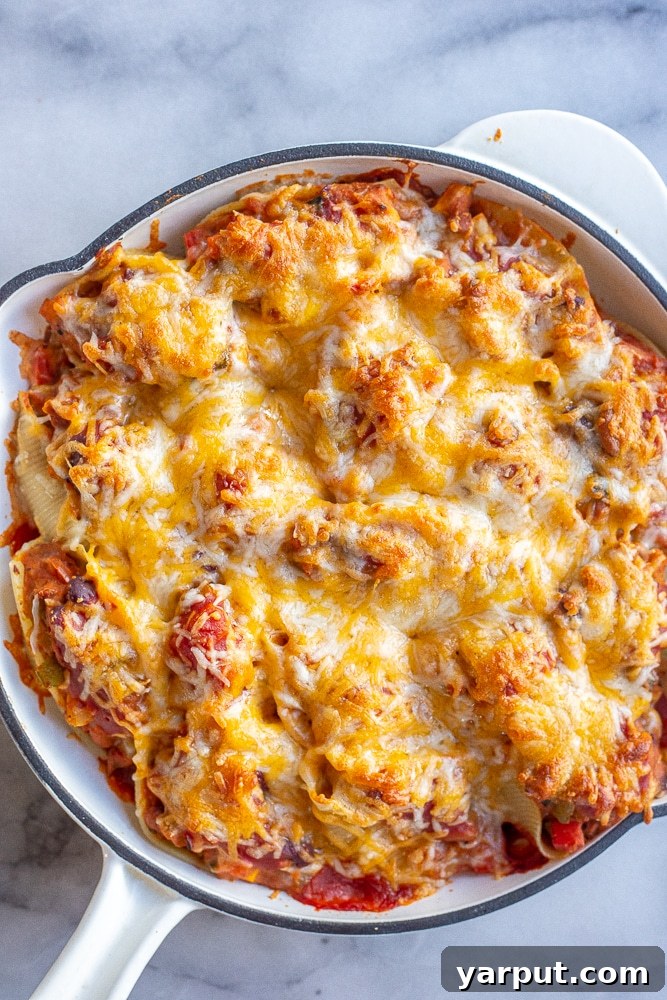
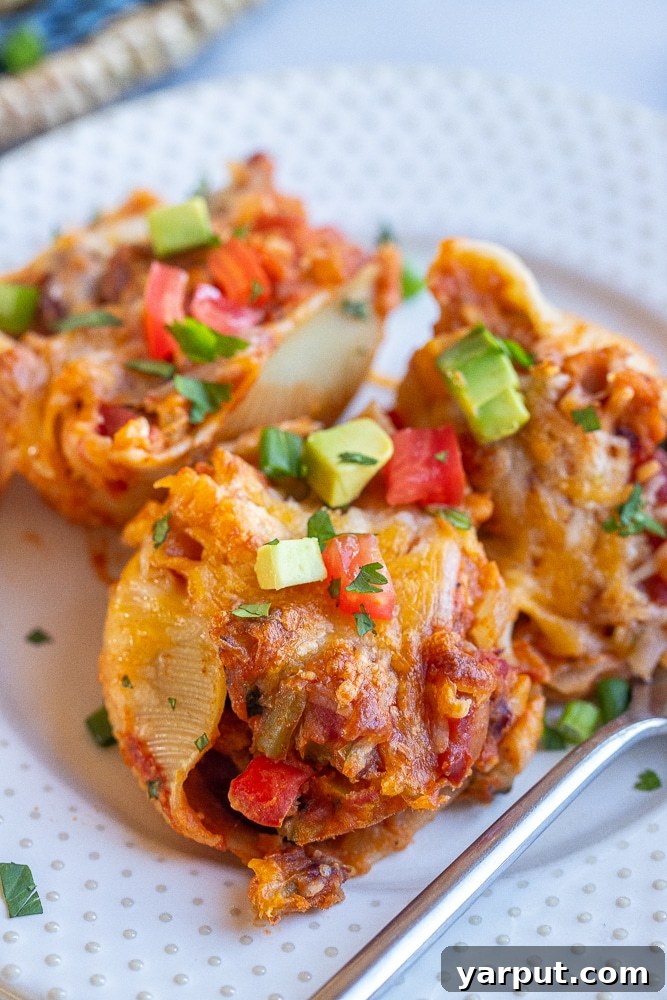
- Bake to Golden Perfection: Once all shells are arranged, spoon a little extra chili sauce over each shell. Then, generously sprinkle the remaining 3/4 cup (or more, if you love cheese!) of shredded cheese over all the shells. Place the baking dish into your preheated oven and bake for 20-25 minutes, or until the cheese is completely melted, bubbly, and slightly golden. For an extra cheesy crust without overcooking the pasta, you can cover the dish with foil for the first 15 minutes of baking, then remove the foil for the last 5-10 minutes to allow the cheese to brown beautifully. Once baked, remove from the oven, let it cool for a few minutes, then top with your favorite chili toppings and serve immediately. Enjoy this comforting and incredibly delicious meal!
Frequently Asked Questions About Vegetarian Chili Cheese Stuffed Shells
Here are answers to some common questions to help you perfect this delightful recipe.
- Can this recipe be made gluten-free? Absolutely! To make these chili cheese stuffed shells gluten-free, the main modification needed is to source gluten-free jumbo shell noodles. Many brands now offer delicious gluten-free pasta options that hold up well to stuffing and baking. All other ingredients in the chili are naturally gluten-free.
- Are these stuffed shells vegan? The base chili recipe I recommend is vegan-friendly, but as written, this recipe uses regular dairy cheese, making it vegetarian, not vegan. However, it’s incredibly easy to adapt for a vegan diet! Simply swap out the dairy shredded cheese for your favorite plant-based shredded cheese alternative. Many excellent vegan cheese options melt beautifully. Alternatively, you can omit the cheese entirely for a flavorful dairy-free dish.
- Can leftover chili be used for this recipe? Yes, using leftover or even canned chili is a fantastic shortcut! The most important factor is the consistency of the chili. It needs to be relatively thick, not soupy, so it can be easily scooped and stuffed into the pasta shells without making them soggy. If your leftover chili is too thin, simply simmer it on the stovetop for a while to reduce the liquid until it reaches a thick, spoonable consistency.
- Is this recipe freezer-friendly? Yes, these chili cheese stuffed shells freeze beautifully, making them excellent for meal prep or future busy weeknights. I highly recommend freezing them *before* baking. Assemble the shells as directed, then cover the baking dish tightly with plastic wrap and then foil. Label and freeze for up to 3 months. When ready to bake, thaw in the refrigerator overnight, then bake as instructed, adding about 10-15 minutes to the baking time to ensure they are heated through. You can also freeze cooked leftovers, though the pasta might be slightly softer after reheating.
- How long do leftovers last in the refrigerator? Cooked and cooled chili cheese stuffed shells can be stored in an airtight container in the refrigerator for about 4-5 days. Reheat gently in the microwave or oven until warmed through.
- Can I prepare these stuffed shells ahead of time? Yes, this is a great make-ahead meal! You can prepare the chili filling a day or two in advance and store it in the refrigerator. Cook and cool the shells, then assemble the dish up to 24 hours before baking. Cover tightly and refrigerate. When ready to serve, simply bake as directed, potentially adding a few extra minutes to the baking time since it will be going into the oven cold.
- What if I don’t have jumbo shells? Are there other pasta options? If jumbo shells are unavailable, manicotti or cannelloni tubes are excellent substitutes that are also designed for stuffing. You could also try larger pasta shapes like large rigatoni, although they might be harder to stuff neatly. In a pinch, you could even layer the ingredients like a deconstructed lasagna for a similar flavor profile.
- How can I make the cheese topping extra crispy and golden? For a beautiful golden-brown and slightly crispy cheese topping, after the initial baking time, you can briefly place the dish under the broiler for 1-2 minutes. Keep a very close eye on it, as cheese can burn quickly! This will give you that irresistible golden crust.
Have a question I didn’t answer? Feel free to ask in the comments below, and I’ll be happy to help!
Explore More Vegetarian Comfort Food Recipes!
If you loved these Chili Cheese Stuffed Shells, you’ll surely enjoy these other comforting vegetarian dishes:
Hearty Curried Vegetable Pot Pie (Vegan)
Classic Vegetarian Sloppy Joes
Creamy Red Thai Curry Noodles with Fresh Veggies
Flavorful Vegetarian “Tuna” Melts
Satisfying Stuffed Pepper Casserole with Soyrizo
Print
Vegetarian Chili Cheese Stuffed Shells
5 Stars 4 Stars 3 Stars 2 Stars 1 Star
5 from 1 review
Author: She Likes Food
Total Time: 1 hour 5 minutes
Yield: 6 1x
Diet: Vegetarian
Description
These Vegetarian Chili Cheese Stuffed Shells are the ultimate comfort food! It doesn’t get much better than pasta, chili and melted cheese in one bowl! You can make these chili stuffed shells using leftover chili, or you can use my super delicious veggie chili recipe. Great for a filling family dinner.
Ingredients
Scale
- 2 teaspoons olive oil
- 1/2 large yellow onion, diced
- 1 red bell pepper, diced
- 1 green bell pepper, diced
- 1 small zucchini, diced
- 1 small yellow squash, diced
- 2–3 cloves garlic, minced
- 1 (15 oz) can red kidney beans, drained and rinsed
- 1 (15 oz) can pinto beans, drained and rinsed
- 1 (14.5 oz) can diced tomatoes, with most of the liquid drained out
- 1 cup refried beans
- 2 tablespoons tomato paste
- 2 teaspoons ground cumin
- 1 teaspoon paprika
- 1 teaspoon chili powder
- 1 teaspoon garlic powder
- 1 teaspoon salt
- 1/2 teaspoon onion powder
- 1/2 teaspoon Italian seasoning
- 1/2 teaspoon black pepper
- 1 (16 oz) box large shells
- 1 1/2 cups chili sauce, taco sauce or red enchilada sauce
- 1 1/2 cups shredded cheese
- Favorite chili toppings: avocado, onion, tomato, green onion, cilantro, corn chips, crackers, hot sauce, etc…
Instructions
- Pre-heat oven to 425 degrees F. This can be done at the beginning of the recipe or just before you are ready to put the stuffed shells in the oven.
- Start by preparing your chili. You can use leftover chili or canned chili if you like, you just want to make sure it is pretty thick in consistency. Heat a large pot over medium heat and olive oil, onion, bell peppers, zucchini and summer squash with a pinch of salt. Stir together and cook veggies until softened, 7-10 minutes. Add in the garlic and cook another minute.
- Add in the beans, canned tomatoes, tomato paste, refried beans and seasonings. Mix everything together well and let cook for about 5-10 minutes. Add in a heaping cup of shredded cheese and mix until cheese is melted. Set chili aside until ready to use.
- Heat a large pot of water over high heat until boiling. Add in your extra large shell pasta, along with a little bit of olive oil (to make sure the shells don’t stick together). Cook until shells are aldente, about 10-12 minutes. Drain pasta and rinse with cold water, to stop the cooking process. Allow shells to cool long enough that you can handle them. I like to lay them out on a clean kitchen towel because that helps ensure they are not sticking together and it allows for me to be able to open them up.
- Add about 1/2 cup of chili sauce to the bottom of a large baking dish and spread around in an even layer. Use a spoon to fill each shell with the chili mixture, you want a couple of tablespoons in each one. Place the filled shells into the baking dish in a single layer, you can pack them in as lightly as you like.
- Top each shell with a little spoonful of chili sauce and then top all the shells with about 3/4 cup of shredded cheese, or more if desired. Place the shells in the oven and bake until cheese is completely melted, 20-25 minutes. You can also cover with foil for the first 15 minutes or so and then remove it to make sure the cheese gets completely melted. Top with your favorite chili toppings and enjoy!
- Prep Time: 20 mins
- Cook Time: 45 mins
- Category: Dinner, Vegetarian
- Method: Stovetop, Oven
- Cuisine: American