
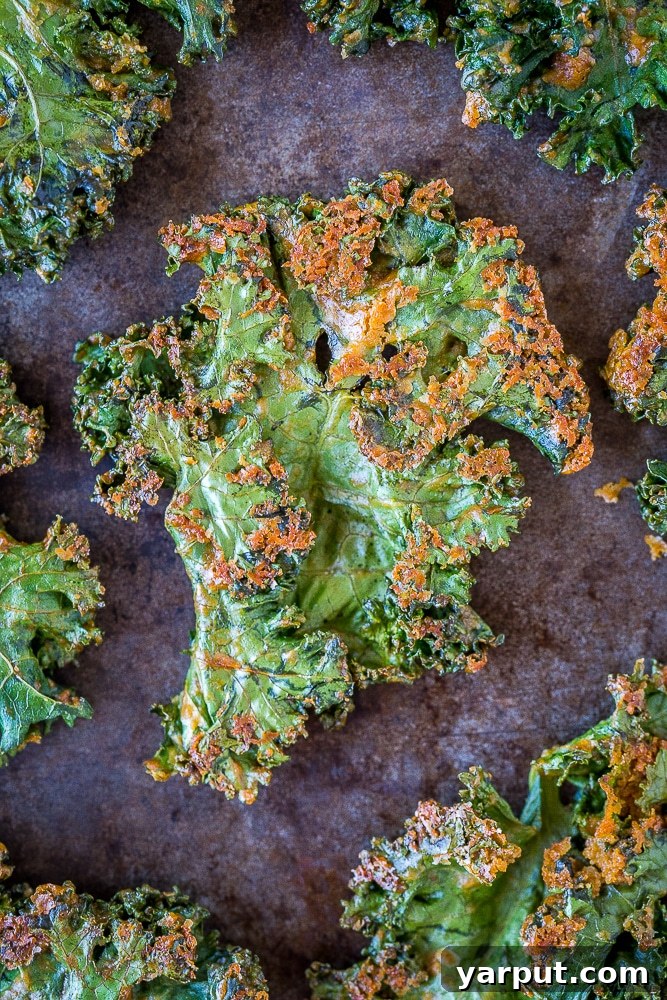
These are The BEST Kale Chips! I never cared for kale chips until I made them this way, and now I eat them all the time. They are kid-friendly, too!
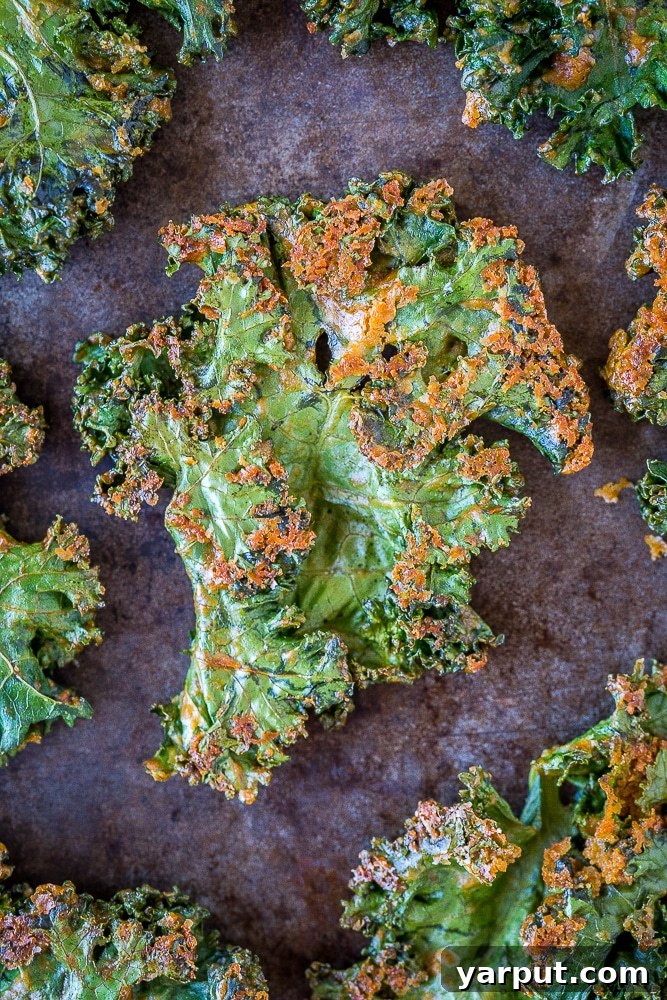
Unlock a New World of Flavor with The BEST Crispy Kale Chips!
For years, I was a staunch member of the “kale hater” club. The mere mention of this leafy green often conjured images of bitter, tough greens that offered little culinary appeal. Cooked, it often tasted uninviting; raw, it seemed an even less appealing prospect. My culinary journey truly began after graduating college when I started experimenting more extensively in my own kitchen, driven by a desire to eat healthier and discover new flavors. While I still haven’t fully embraced sautéed kale, I’ve developed a profound love for fresh, vibrant kale salads, enjoying them almost daily. However, the real game-changer, the recipe that transformed my perception of kale entirely, came with these incredible kale chips. I found myself devouring trays of these irresistible snacks, crispy, flavorful, and utterly addictive. It became clear I had to share this culinary revelation with you. Prepare yourselves, because these truly are The BEST Kale Chips you’ll ever taste!
My quest for the perfect kale chip began last year during a serendipitous visit to a local farmers’ market. Amidst the vibrant stalls brimming with fresh produce, I discovered a vendor selling an array of beautifully seasoned kale chips. Their perfectly crisp texture and enticing aroma were enough to pique my curiosity. I sampled a few, and I was instantly hooked – they were absolutely phenomenal, unlike any kale chip I had tasted before. This recipe is my dedicated attempt to recreate that magical experience right in my own home, elevating the humble kale chip from an “okay” health food to an utterly addictive, flavor-packed snack. It’s a recipe meticulously crafted to convert even the most skeptical kale critics into enthusiastic kale chip aficionados, proving that healthy eating can be incredibly delicious.
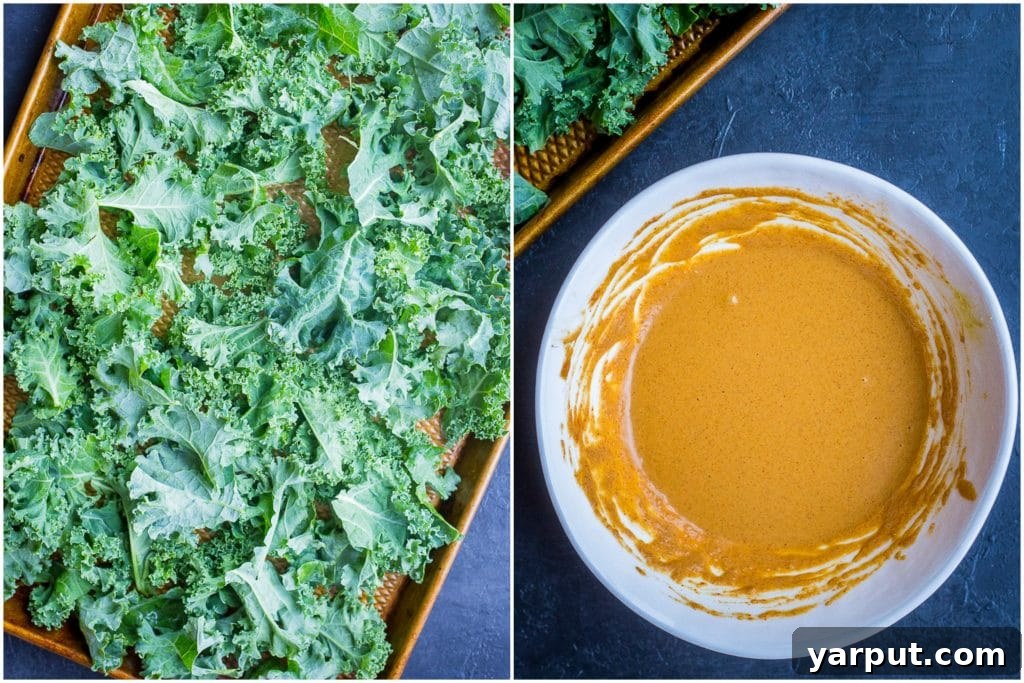
Essential Ingredients for Your Perfectly Crispy Kale Chips
What sets these kale chips apart from every other recipe out there? It’s all in the unique, savory, and creamy coating that transforms ordinary kale into an extraordinary snack. Forget bland olive oil and salt; this recipe introduces a rich, umami-packed sauce that adheres beautifully to every leaf, ensuring maximum flavor and an unbeatable crunch. Here’s a closer look at the stars of this truly exceptional recipe:
- Kale: For this recipe, I typically use a small bunch of curly kale due to its ruffled edges that wonderfully capture and hold the sauce. However, feel free to use any variety of kale you have available or prefer, such as Lacinato (Dinosaur) kale, which also works excellently. The key is to select fresh, vibrant green leaves without any signs of yellowing or wilting, as the freshness of your kale significantly impacts the final crispiness and flavor of your chips.
- Tahini: This creamy sesame paste is the secret weapon, providing an incredible, rich, and nutty base for our coating. The quality of your tahini plays a crucial role here; opt for a brand that is less bitter to your taste for the best results. Tahini not only adds a wonderful depth of flavor but also helps create that essential, irresistible crisp texture when baked.
- Tamari or Soy Sauce: To infuse a robust, savory, and umami-rich kick into our chips. Tamari is my preferred choice as it is typically gluten-free, making these chips suitable for those with sensitivities. However, if gluten is not a concern, regular soy sauce works perfectly and will deliver a similar depth of flavor.
- Nutritional Yeast: Prepare for a flavor revelation with nutritional yeast! This ingredient is non-negotiable for achieving the signature taste of these chips. It imparts a delightful, cheesy, and savory umami flavor that is characteristic of many plant-based dishes. It’s precisely what gives these kale chips their incredible “nacho cheese” or “taco” like appeal, making them truly addictive and satisfying.
- Fresh Lemon Juice: A squeeze of fresh lemon juice is vital for brightening up the entire flavor profile. It adds a zesty, acidic counterpoint to the richness of the tahini and the savoriness of the nutritional yeast and tamari. Always opt for freshly squeezed lemon juice over bottled for the most vibrant and impactful flavor.
- Spices: Our carefully curated blend of cumin, paprika, granulated garlic, and a pinch of salt creates a warm, earthy, and slightly smoky flavor that is utterly craveable and complex.
- Cumin: Adds a distinct warm and earthy note, reminiscent of traditional taco seasonings.
- Paprika: Contributes a mild sweetness, a beautiful reddish hue, and a subtle hint of smokiness that enhances the overall savory profile.
- Granulated Garlic: Provides a deep, aromatic garlic flavor that perfectly complements the cheesy notes from the nutritional yeast, adding another layer of savory deliciousness.
- Salt: An essential seasoning that brings out and enhances all the other flavors, ensuring a well-balanced taste.
This thoughtful combination of spices creates a flavor profile that surprisingly mimics the delicious, savory taste of your favorite seasoned chips, but in a significantly healthier and more nutritious form!
I’ve experimented with various flavor combinations for kale chips in the past – from smoky BBQ to tangy Ranch – but I always found myself returning to this particular blend. The tahini and nutritional yeast together create a creamy, deeply flavorful base that perfectly adheres to the kale leaves, transforming them into something truly magical and irresistibly crunchy once baked. This unique coating ensures every single chip is packed with that coveted “taco” or “nacho cheese” inspired seasoning, making them a standout healthy snack that you’ll crave again and again.
The Incredible Health Benefits of These Green Powerhouses
Beyond their amazing taste, these crispy kale chips are a powerhouse of nutrition, offering a multitude of benefits for your body, both inside and out. It’s truly a snack you can feel good about indulging in, knowing you’re nourishing yourself with every satisfying crunch!
- Antioxidant-Rich Superfood: Dark leafy greens, with kale leading the pack, are celebrated for their incredibly high antioxidant content. These vital compounds are crucial for fighting harmful free radicals in the body, which helps to significantly reduce inflammation. Chronic inflammation is increasingly linked to numerous health issues, including various diseases. Kale also boasts a wealth of other essential nutrients that support overall well-being:
- Heart and Blood Health: Rich in potassium, naturally occurring nitrates, and iron, all of which contribute to a healthy cardiovascular system and robust blood circulation.
- Bone Strength: Packed with Vitamin K, magnesium, and calcium, these are fundamental nutrients for building and maintaining strong, healthy bones throughout your life.
- Eye and Vision Support: A fantastic source of Vitamin A and lutein, powerful antioxidants specifically known to promote optimal eye health and protect vision.
- Tahini: A Nutrient-Dense Addition: Tahini, a delicious and versatile butter made from finely ground sesame seeds, is not just for adding incredible flavor! It’s an excellent source of bone-building calcium and magnesium. Furthermore, tahini is loaded with powerful antioxidants that play a key role in bolstering your immune system. Its rich iron content is essential for healthy blood, while its vitamin E contributes to radiant, happy skin, promoting beauty from within.
- Lemon Juice: A Zesty Boost of Wellness: Fresh lemon juice is much more than just a flavor enhancer; it’s a wholesome liquid bursting with health benefits. It’s brimming with potassium, beneficial flavonoids, and calcium. Most notably, it’s an exceptional source of Vitamin C. This well-known vitamin is a champion for immune system health, plays a critical role in efficient wound healing, and is vital for collagen production, which keeps your skin, hair, and nails healthy and strong.
Together, these thoughtfully combined ingredients create a snack that is not only incredibly delicious and satisfying but also provides a comprehensive boost of essential vitamins, minerals, and potent antioxidants. This makes these crispy kale chips a truly guilt-free indulgence, supporting your overall health and well-being with every delightful bite.
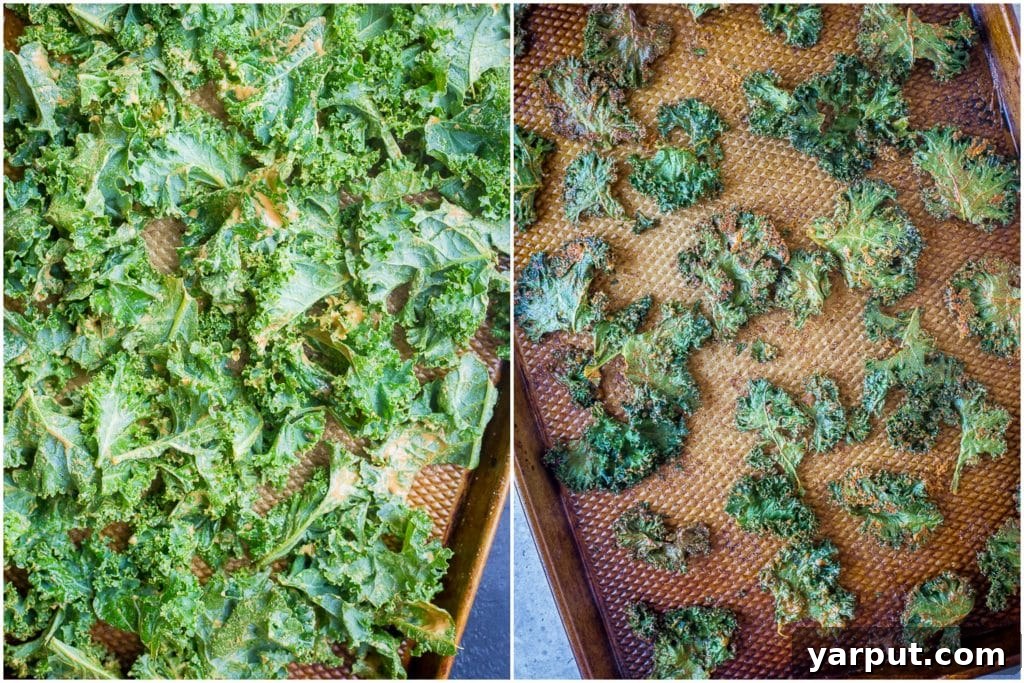
Expert Tips for Achieving Perfectly Crispy Kale Chips Every Time
After numerous batches, extensive testing, and a few learning experiences, I’ve gathered some crucial insights to ensure your kale chips turn out perfectly crispy and deliciously seasoned every single time. Follow these expert tips for optimal results and to avoid common pitfalls:
- Thoroughly Dry Your Kale: This step cannot be overstated – it is arguably the most critical factor for achieving truly crisp kale chips. Any residual moisture on the kale leaves will lead to steaming rather than baking, inevitably resulting in soggy, chewy chips. After washing, use a salad spinner to remove as much water as possible. Then, spread the kale out on clean kitchen towels or paper towels and gently pat it completely dry. Don’t rush this stage; perfectly dry kale is the foundation of perfect crispness.
- Ensure Even Coating is Key: The magic of these chips truly lies in their flavorful tahini-based coating. It’s imperative that every single piece of kale is evenly coated with the sauce. Take your time to gently massage the sauce into the leaves with your hands, ensuring there are no bare spots. Equally important, ensure there are no thick “globs” or pools of sauce on any individual leaf. A thick patch of sauce will prevent that area from crisping up properly, leaving it soft and unappealing while the rest of the chip gets crunchy.
- Avoid Overcrowding the Baking Sheet: This is a common mistake that significantly hinders crispiness. Piling kale leaves on top of each other prevents proper air circulation around each piece. When kale is crowded on the baking sheet, it steams instead of bakes, resulting in limp, rather than satisfyingly crisp, chips. Always arrange the kale in a single layer on your baking sheet, allowing plenty of space between each piece for hot air to circulate. If you have a large batch of kale, it’s far better to bake it in multiple batches using separate trays than to overcrowd one, ensuring consistent crispness.
- Keep a Vigilant Eye on Your Oven: Oven temperatures can vary significantly, and kale chips can transition from perfectly golden and crisp to sadly burnt in a matter of moments. While I suggest a baking time of approximately 20 minutes, it’s absolutely vital to start checking on them a few times before the timer goes off, especially if you know your oven runs hot. Look for the edges to brown slightly and the kale to feel firm and shatter-crisp when gently touched. If they look ready, don’t hesitate to remove them or flip them early. The goal is golden-brown perfection, not charcoal.
- The Post-Bake Cool-Down: Patience is a virtue, especially when it comes to achieving ultimate crispiness in kale chips. Once you remove them from the oven, resist the urge to devour them immediately. Let the kale chips sit on the baking sheet for about 5 minutes, or even transfer them to a wire rack. As they cool, they will continue to firm up and crisp, reaching their optimal crunchy texture. This brief cooling period is absolutely essential for that satisfying snap!
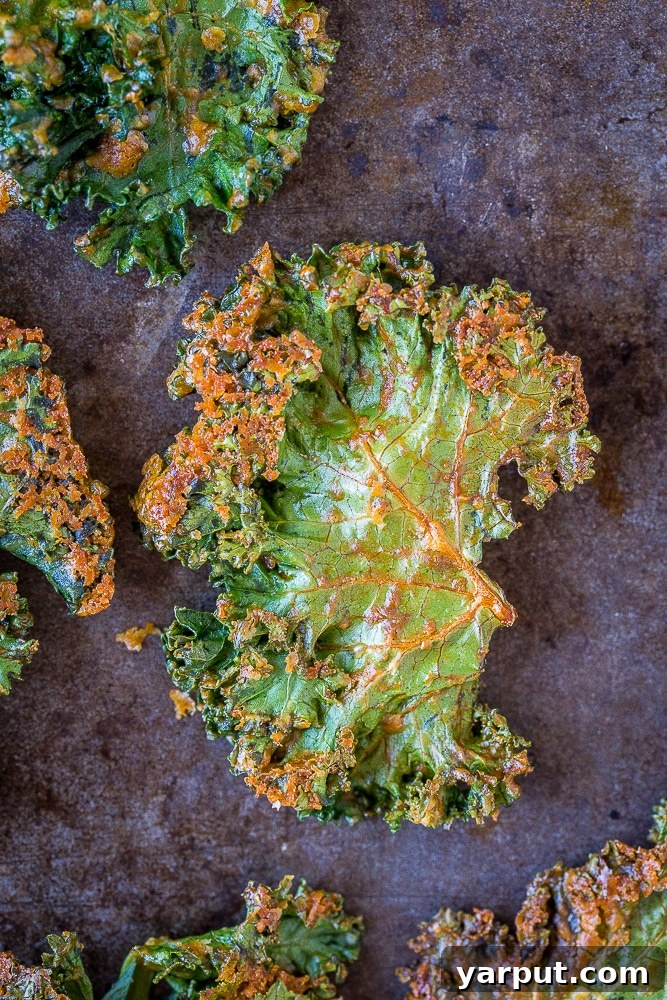
Step-by-Step Guide: How To Make The Best Vegan Kale Chips
Ready to create these incredibly addictive and healthy kale chips? Here’s a detailed, step-by-step guide to ensure your success:
- Prepare Your Kale: First, preheat your oven to 350 degrees F (175°C). While the oven heats, thoroughly rinse your fresh kale leaves under cool running water. This ensures all dirt and debris are removed. Using your hands or a sharp knife, carefully remove the leafy green parts from the tough, fibrous stems. Discard the stems, as they will not crisp up properly. Tear the kale leaves into bite-sized pieces, aiming for roughly the size of a potato chip for optimal snacking. This is a crucial step: lay the kale pieces out onto a large baking sheet in a single layer. Ensure none of the pieces overlap. This precise spacing is vital for crisping, as it allows hot air to circulate freely around each individual chip, preventing them from steaming. While parchment paper isn’t strictly necessary for non-stick baking sheets (I often forget it!), it can definitely make flipping and cleanup a bit easier.
- Craft the Flavorful Sauce: In a small mixing bowl, combine all the remaining ingredients for the sauce: tahini, water, tamari (or soy sauce if preferred), nutritional yeast, fresh lemon juice, cumin, paprika, granulated garlic, and a pinch of salt. Whisk everything together thoroughly until you have a smooth, well-combined, and consistent sauce. It should be creamy but still pourable, ensuring it coats the kale evenly.
- Coat the Kale: Pour the prepared sauce evenly over the kale leaves that are spread out on the baking sheet. Now, it’s time to get your hands in there! Gently but thoroughly massage the sauce into every single kale leaf. This hands-on approach ensures even distribution and optimal adhesion of the seasoning. Make sure no leaf is left uncoated and that there are no thick clumps or “globs” of sauce on any particular spot, as this will prevent that area from crisping up properly.
- Bake to Crispy Perfection: Carefully place the baking sheet with the coated kale into your preheated oven. Bake for approximately 20 minutes. However, remember to keep a close eye on them! Oven temperatures can vary, and kale chips can go from perfectly golden and crisp to burnt very quickly. Start checking them around the 15-minute mark. Look for the edges to brown slightly and the kale to feel firm and shatter-crisp when gently touched. If they are looking nicely browned and crispy, carefully remove them from the oven, gently flip them over with a spatula (this helps with even crisping on both sides), and return them to the oven for another 2 minutes. Once golden and shatter-crisp, remove them from the oven for the final crucial step.
- Cool and Enjoy: Once baked to perfection, transfer the hot kale chips to a cooling rack or simply let them rest on the baking sheet for about 5 minutes. This cooling period is essential as it allows them to firm up even further and become incredibly crispy. Resist the urge to eat them immediately; that short wait will be richly rewarded with an unparalleled crunchy texture. Once cooled slightly, they are ready to be enjoyed as a delightful and healthy snack!
A Snack That Converts Even the Toughest Critics: Kids and Kale Haters Unite!
One of the most rewarding and exciting aspects of this recipe is its undeniable universal appeal. These savory, perfectly seasoned kale chips offer a fantastic, delicious, and surprisingly easy way to introduce kids to the goodness of kale in a form they’ll actually love! I can personally attest to this remarkable power of conversion. Just the other day, as I pulled a fresh, aromatic batch out of the oven, my typically vegetable-averse 3-year-old curiously asked for one. To my absolute astonishment, he not only tried it but loved it! He eagerly requested a small bowl full, and after quickly devouring those, he promptly asked for more. If these perfectly seasoned, crispy delights can win over a discerning and often picky 3-year-old, I am absolutely confident that they can transform any kale skeptic, regardless of age, into a devoted kale chip lover. They are truly the ultimate healthy snack that tastes surprisingly like an indulgent, cheesy treat!
Creative Ways to Enjoy Your Crispy Kale Chips
While these kale chips are undeniably delicious straight off the cooling rack, there are many other versatile and exciting ways to incorporate them into your meals and snacks:
- Stand-Alone Snack: The most obvious and often preferred way! Grab a handful whenever hunger strikes for a satisfying, nutritious crunch that beats any unhealthy alternative.
- Salad Topper: Crumble them generously over your favorite fresh salads instead of traditional croutons for an added layer of robust flavor, delightful texture, and extra nutrients.
- Soup Garnish: Sprinkle a handful over creamy soups (such as tomato, butternut squash, or lentil soup) just before serving. They provide a wonderful textural contrast and a savory boost that elevates the dish.
- Grain Bowl Enhancer: Add these crispy gems to your grain bowls alongside roasted vegetables, plant-based proteins, and a flavorful dressing for an extra crunch and an injection of superfood goodness.
- Sandwich/Wrap Filling: Tuck a few kale chips into your sandwiches or wraps for an unexpected crisp element that adds a unique twist and a burst of savory flavor.
Storage Tips for Maintaining Optimal Freshness and Crispness
If, by some miracle, you happen to have any leftover kale chips, proper storage is crucial to maintaining their delightful crispness and flavor for as long as possible:
- Airtight Container: Ensure the kale chips are completely cooled to room temperature before storing them. Then, transfer them into an airtight container. This prevents moisture from the air from making them soggy.
- Consume Quickly: For the absolute best crispiness and flavor, aim to eat them within 1-2 days of baking. While they can be stored for up to 3 days, they will gradually lose their crisp texture over time as they absorb ambient moisture.
- Re-crisping (Optional): If your kale chips do become slightly soft after a day or two, you can attempt to re-crisp them in a low oven (around 250°F / 120°C) for just a few minutes. However, exercise extreme caution and watch them closely, as they can go from re-crisped to burnt very quickly.
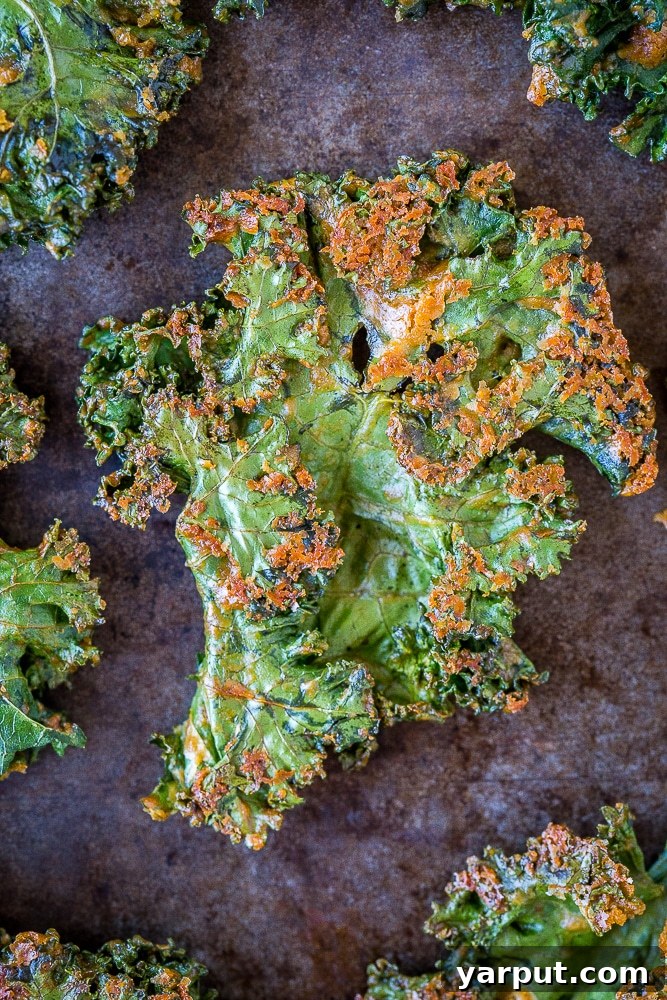
Do you have any questions about this recipe, or perhaps some fantastic tips you’d like to share with fellow kale chip enthusiasts? Please feel free to leave a comment below, and I’ll be happy to get back to you as soon as possible! Your feedback and experiences are always welcome.
Craving More Delicious and Healthy Kale Recipes?
If you’ve fallen in love with kale through these amazing chips, you’ll be thrilled to discover its incredible versatility in a wide array of other dishes. Explore these delightful kale-centric recipes and continue your journey with this nutritious superfood:
- Kale and White Bean Pasta with Parmesan
- Sun-Dried Tomato Pasta with Kale and Feta
- Lemony Kale Salad with Feta Cheese
- Holiday Salad with Cabbage and Kale
- Rice Salad with Chickpeas and Kale
- Kale Caesar Salad Pitas
Print

The BEST Kale Chips
5 Stars 4 Stars 3 Stars 2 Stars 1 Star
5 from 1 review
Author: She Likes Food
Total Time: 32 minutes
Yield: 2 1x
Description
These are the BEST Kale Chips! If you think you don’t like kale chips, I promise that this recipe will convert you!
Ingredients
Scale
- 1 small bunch curly kale
- 1 tablespoon tahini
- 2 teaspoons water
- 2 teaspoons tamari, or soy sauce
- 2 teaspoons nutritional yeast
- 1/2 teaspoon fresh lemon juice
- 1/4 teaspoon cumin
- 1/4 teaspoon paprika
- 1/4 teaspoon granulated garlic
- Pinch salt
Instructions
- Preheat oven to 350 degrees F. Rinse kale and using your hands, or a knife, remove the kale leaves from the stem. Tear the leave into bite size pieces and place on a baking sheet. You want to lay out the kale leaves so that they aren’t overlapped so they have room to crisp up. Parchment paper will make them easier to flip, but I usually forget to use it and they turn out fine.
- Add all remaining ingredients to a small bowl and mix until combined. Pour sauce over kale leaves and use your hands to mix together and make sure that all kale leaves are coated with the sauce.
- Bake kale chips for about 20 minutes, remove from the oven and flip the over and bake for another 2 minutes. Let kale chips sit for about 5 minutes to crisp up even more before enjoying.
Notes
The sauce makes enough for all the kale chips that will fit on one large baking sheet. If you want to make more than that you can just whip up a new batch of sauce for each batch of chips you make.
Store kale chips in an airtight container at room temperature if you don’t eat them immediately. Kale chips can be stored up to 3 days but will lose their crispness as the days go on.
- Prep Time: 10 mins
- Cook Time: 22 mins
- Category: Snack, Vegan
- Method: Oven
- Cuisine: American